
In this third installment of our Fortinet ZTNA series, we explore integrating SAML authentication with Microsoft Azure as the Identity Provider (IdP) and FortiGate as the Service Provider (SP). By leveraging SAML, authentication is offloaded from the access proxy to the IdP, allowing organizations to enforce advanced authentication policies such as Multi-Factor Authentication (MFA)
To learn more about SAML authentication, check out my by blog post: SAML Authentication
Configuring a SAML Application (IdP) on Microsoft Azure
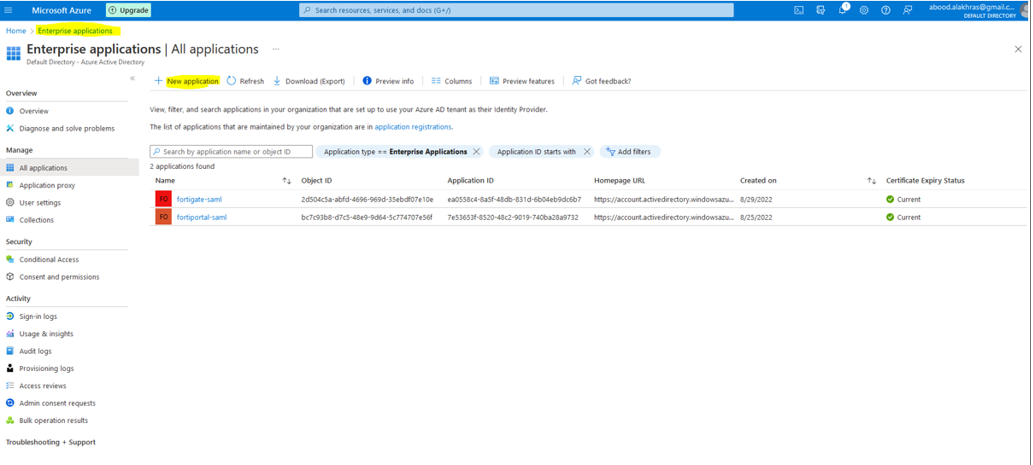
Step 1: Create an Enterprise Application
- Log in to the Azure Administration Console under your customer tenant.
- Navigate to Enterprise Applications > New Application.
 3. Choose “Create your own application”, enter a name (e.g., “fortigate-saml”), and select “Integrate any other application you don’t find in the gallery (Non-gallery)”.
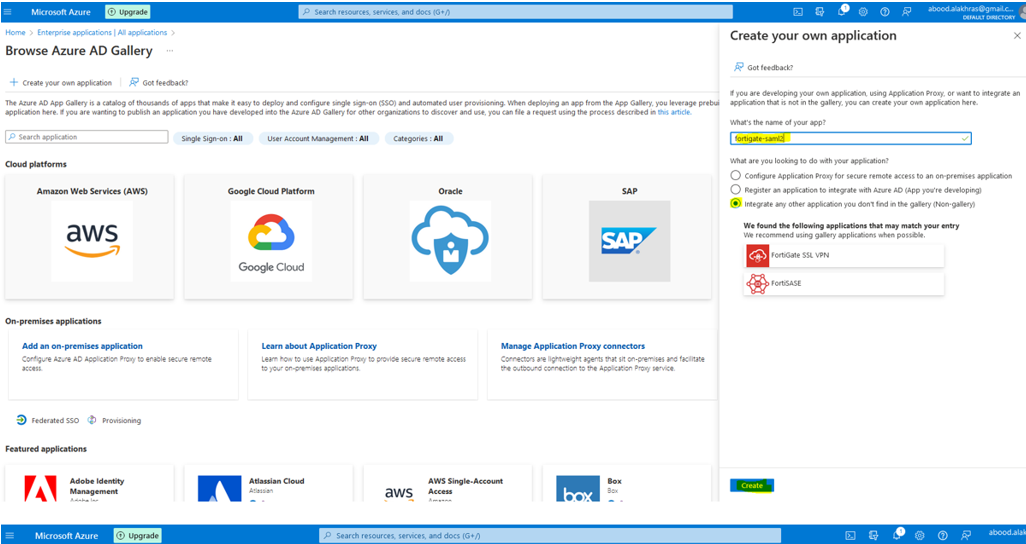 4. Click Create
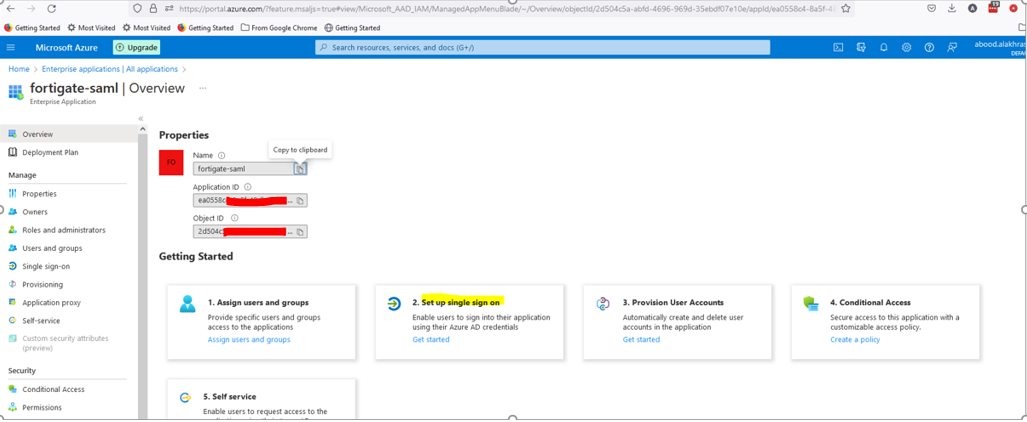
Step 2: Assign Users and Groups
Once the application is created, the overview page will display key configuration steps.
- Under Users and Groups, assign Active Directory users and groups that will use this application.
- Ensure the required users and groups already exist under Azure Active Directory.
- For this Proof of Concept (PoC), we created a group called ZTNA.
- Note the Object ID of the group, as it will be used in FortiGate “User Groups” to control access through SAML attributes.

Step 4: Configure SAML Parameters
Sections Breakdown:
- Sections 1 and 2 require configuration; Sections 3 and 4 are automatically generated.
- Section 1: Identifiers and Reply URLs
- Use the FortiGate proxy VIP as the SP URL (e.g., aboodshouse.fortiddns.com).
- Any proxy VIP port can be used (e.g., 8443, 7443, 9443, 6443).
- Section 2: User Attributes & Claims
- Ensure the correct attributes are mapped:
- username → userprincipalname
- group → user.groups (group claim)
- Ensure the correct attributes are mapped:
- Important: Azure allows only one group claim by default. Delete the existing claim and create a new group claim named groups with value user.groups.
- This step is also documented by Microsoft for using SAML with FortiGate SSL-VPN: Microsoft Docs
Step 5: Retrieve Certificate and Configuration Details
Section 3: Download the Certificate (Base64)—this will be imported into FortiGate.
Section 4: Note all the generated URLs, as they will be required when configuring SAML on FortiGate.

This completes the initial setup of the SAML application on Azure. In the next section, we will cover how to configure FortiGate to integrate with this SAML IdP.
Configuring a SAML Application (SP) on Fortigate
Step 1: Import the SAML Certificate
- Import the exported SAML Certificate (Base64) into FortiGate.
- Rename the certificate in the CLI using:
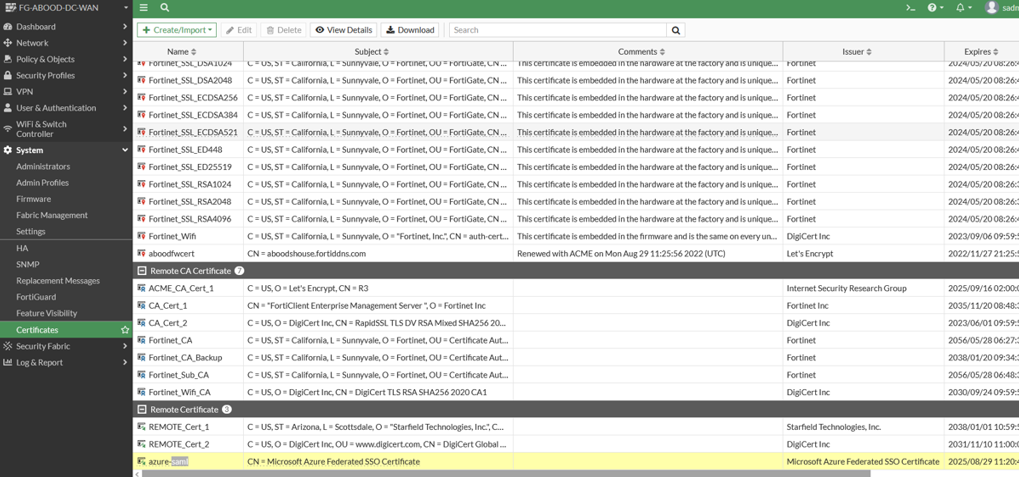
config vpn certificate remote
set name "azure-saml"
end
- This serves as the Remote Certificate, containing only the IdP’s public key, which FortiGate uses to verify signed SAML responses from Azure.
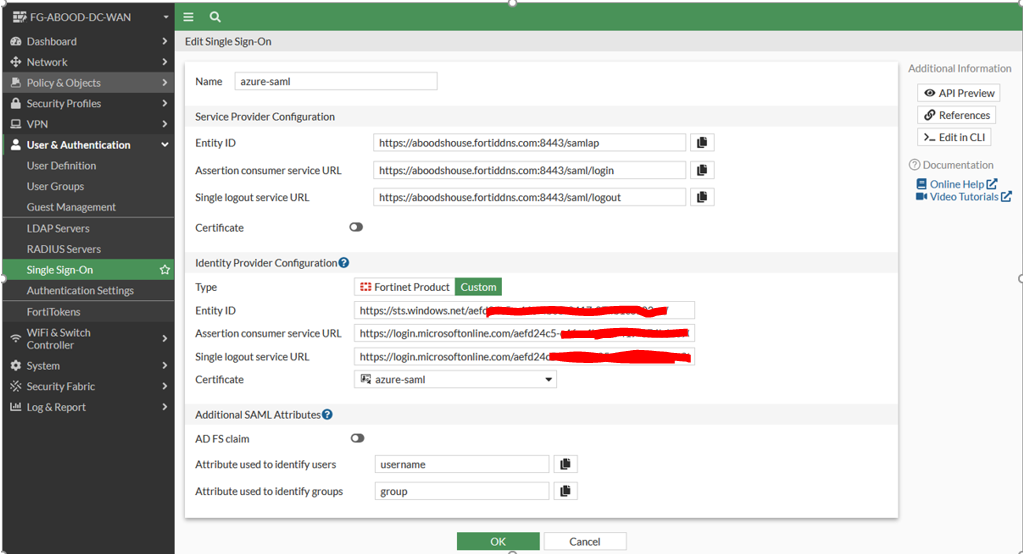
Step 2: Configure SAML on FortiGate
- Navigate to User & Authentication > Single Sign-on.
- Copy and paste all URLs from Sections 1 and 4 of the Azure SAML configuration.
- Ensure the Local Certificate option is disabled, as FortiGate does not require a private key to sign SAML requests.
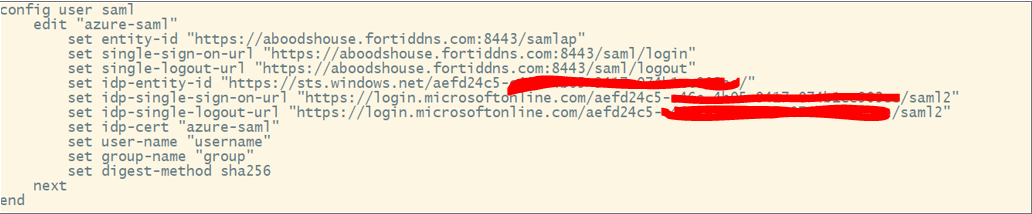
 The equivalent CLI Configuration:
Step 2: Configure SAML on FortiGate
- Navigate to User & Authentication > Single Sign-on.
- Copy and paste all URLs from Sections 1 and 4 of the Azure SAML configuration.
- Ensure the Local Certificate option is disabled, as FortiGate does not require a private key to sign SAML requests.
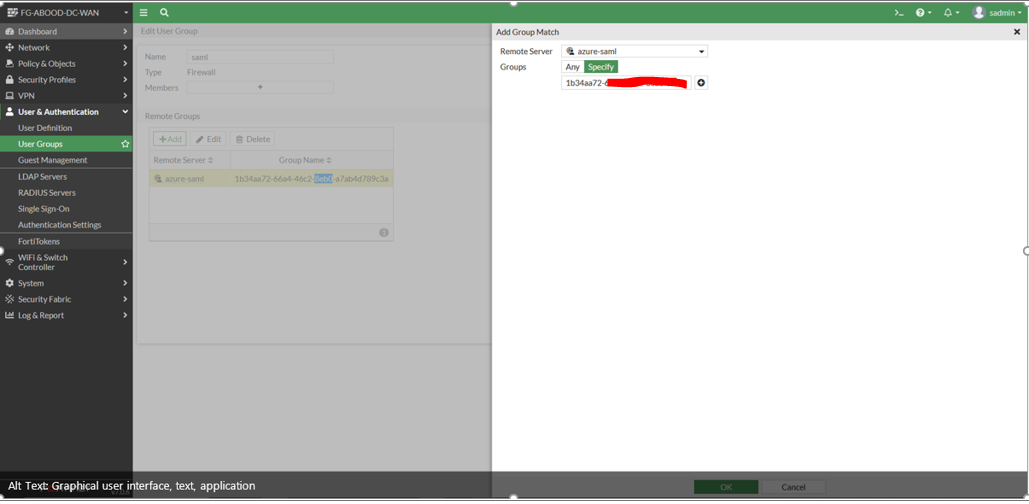
Step 3: Create a User Group
- Create a User Group that references the SAML IdP.
- Set the group type to Firewall.
- Add a remote server named azure-saml (configured in Step 2).
- Use the Object ID of the Azure ZTNA group as the group name.
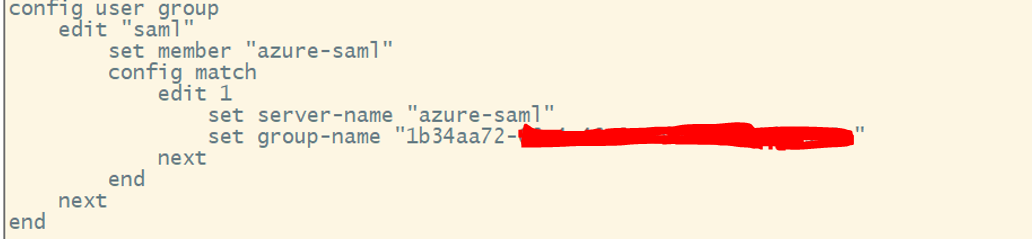
 The equivalent CLI Configuration:
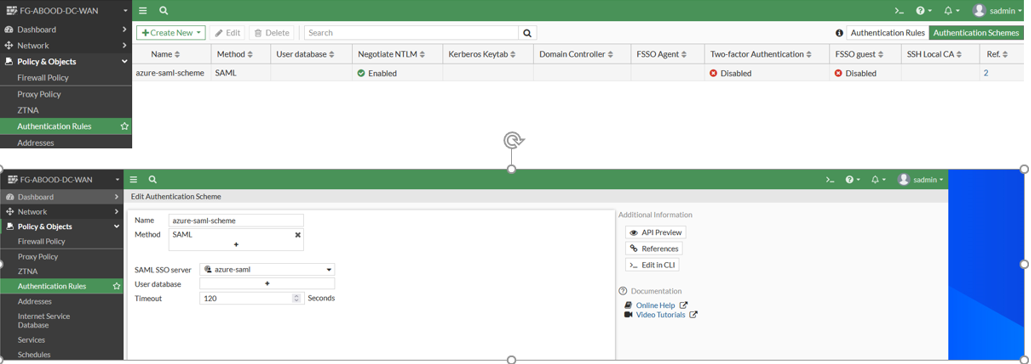
Step 4: Configure Authentication Scheme
- Go to Policy & Objects > Authentication > Authentication Schemes.
- Create a scheme named azure-saml-scheme.
- Select SAML as the authentication method.
- Choose azure-saml as the SAML SSO server.
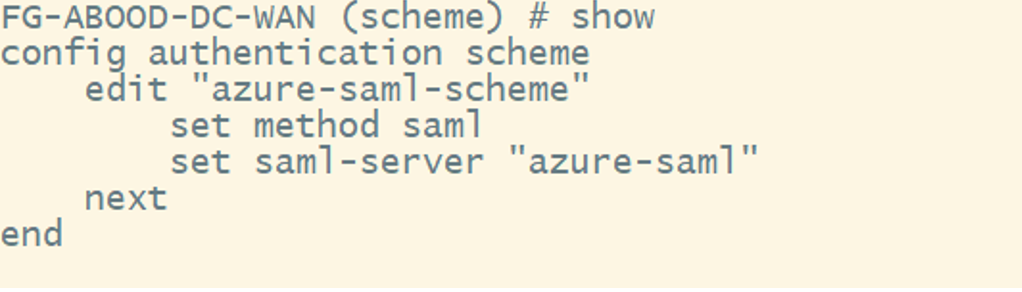
 The equivalent CLI Configuration:
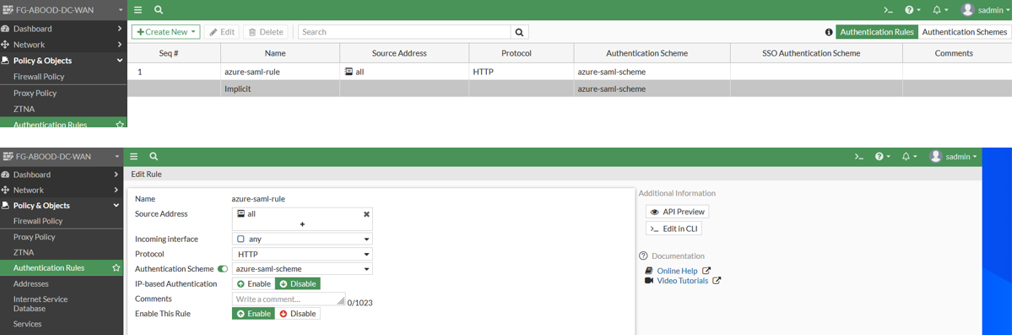
Step 5: Create an Authentication Rule
- Go to Policy & Objects > Authentication > Authentication Rules.
- Create a rule named azure-saml-rule.
- Set source address to All.
- Set incoming interface to Any (or the WAN interface).
- Set protocol to HTTP.
- Select azure-saml-scheme as the authentication scheme.
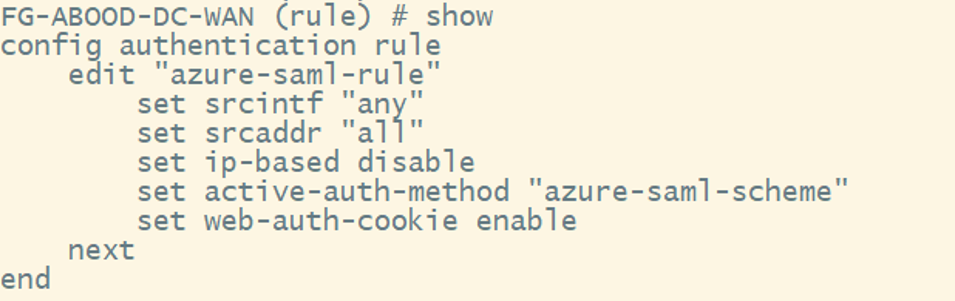
 The equivalent CLI Configuration:
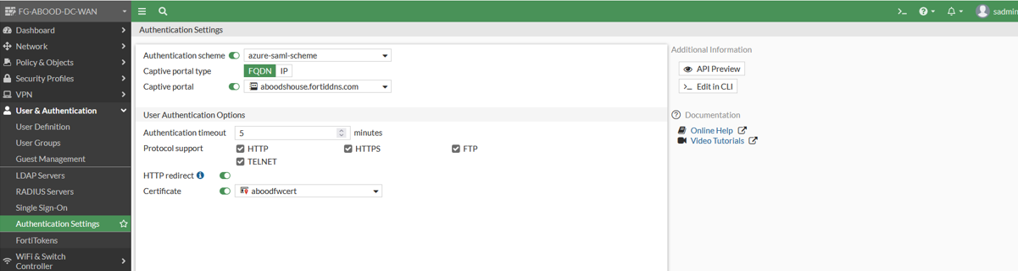
Step 6: Enable Captive Portal
- Go to User & Authentication > Authentication Settings.
- Enable Authentication Scheme and select azure-saml-scheme.
- Enable Captive Portal and set the FortiGate Access Proxy IP or FQDN (e.g., aboodshouse.fortiddns.com).
- Ensure an FQDN/IP address object is created for this setting.
- Enable HTTP Redirect and select the FortiGate SSL certificate (e.g., aboodfwcert).
 The equivalent CLI Configuration:

- Ensure proxy-captive-portal is enabled on the WAN interface.

Next Steps
Your SAML authentication is now set up! In the following sections, we’ll apply these settings to ZTNA policies.