FortiGate support guest Wi-Fi with a captive portal with the portal being the FortiGate itself. The following two login methods can be used:
- Captive portal login with username/password provided to guest users:Accounts are created in bulk on the FortiGate and printed to be provided to end users (e.g., by reception).
- Captive portal login with guests’ email address only:This is a less preferred option. Email collection can be done from FortiGate and exported for marketing use if a certain legal agreement allow it.
This guide assumes that FortiAP is connected to FortiGate via the security fabric. All Wi-Fi configuration and SSID creation is done from the FortiGate.
Captive Portal with Username/Password Provided to Guest Users
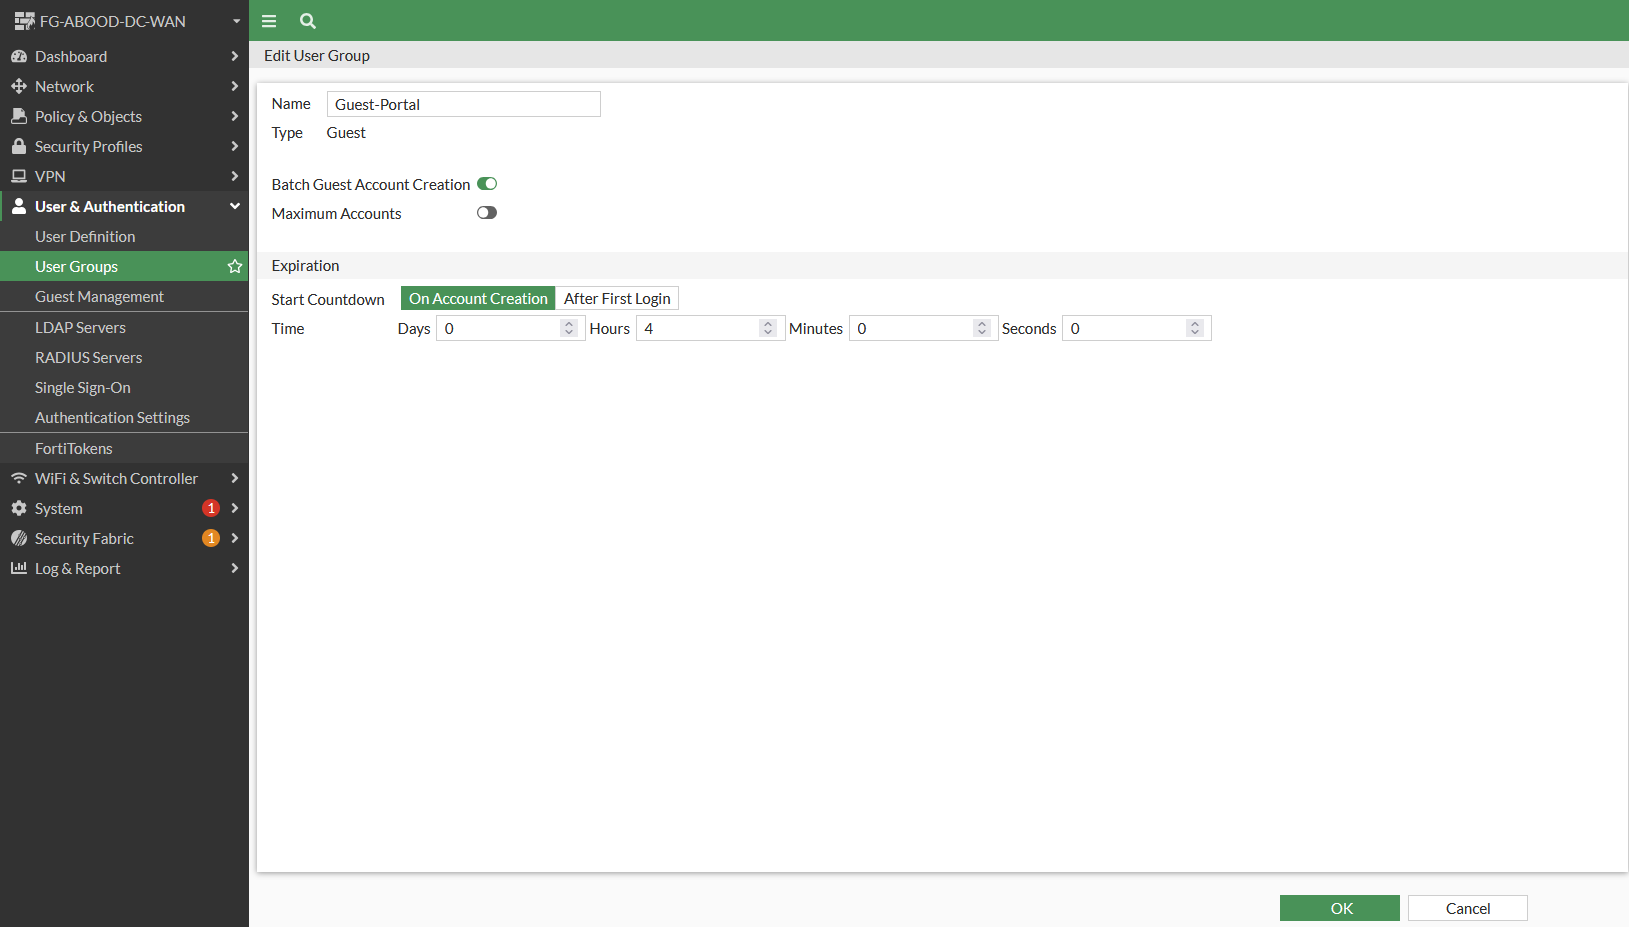
Step 1: Create a Guest Group
- Create a group with the type Guest and enable Batch Guest Account Creation.
- Specify account expiry (e.g., after 4 hours of logging in or as required).
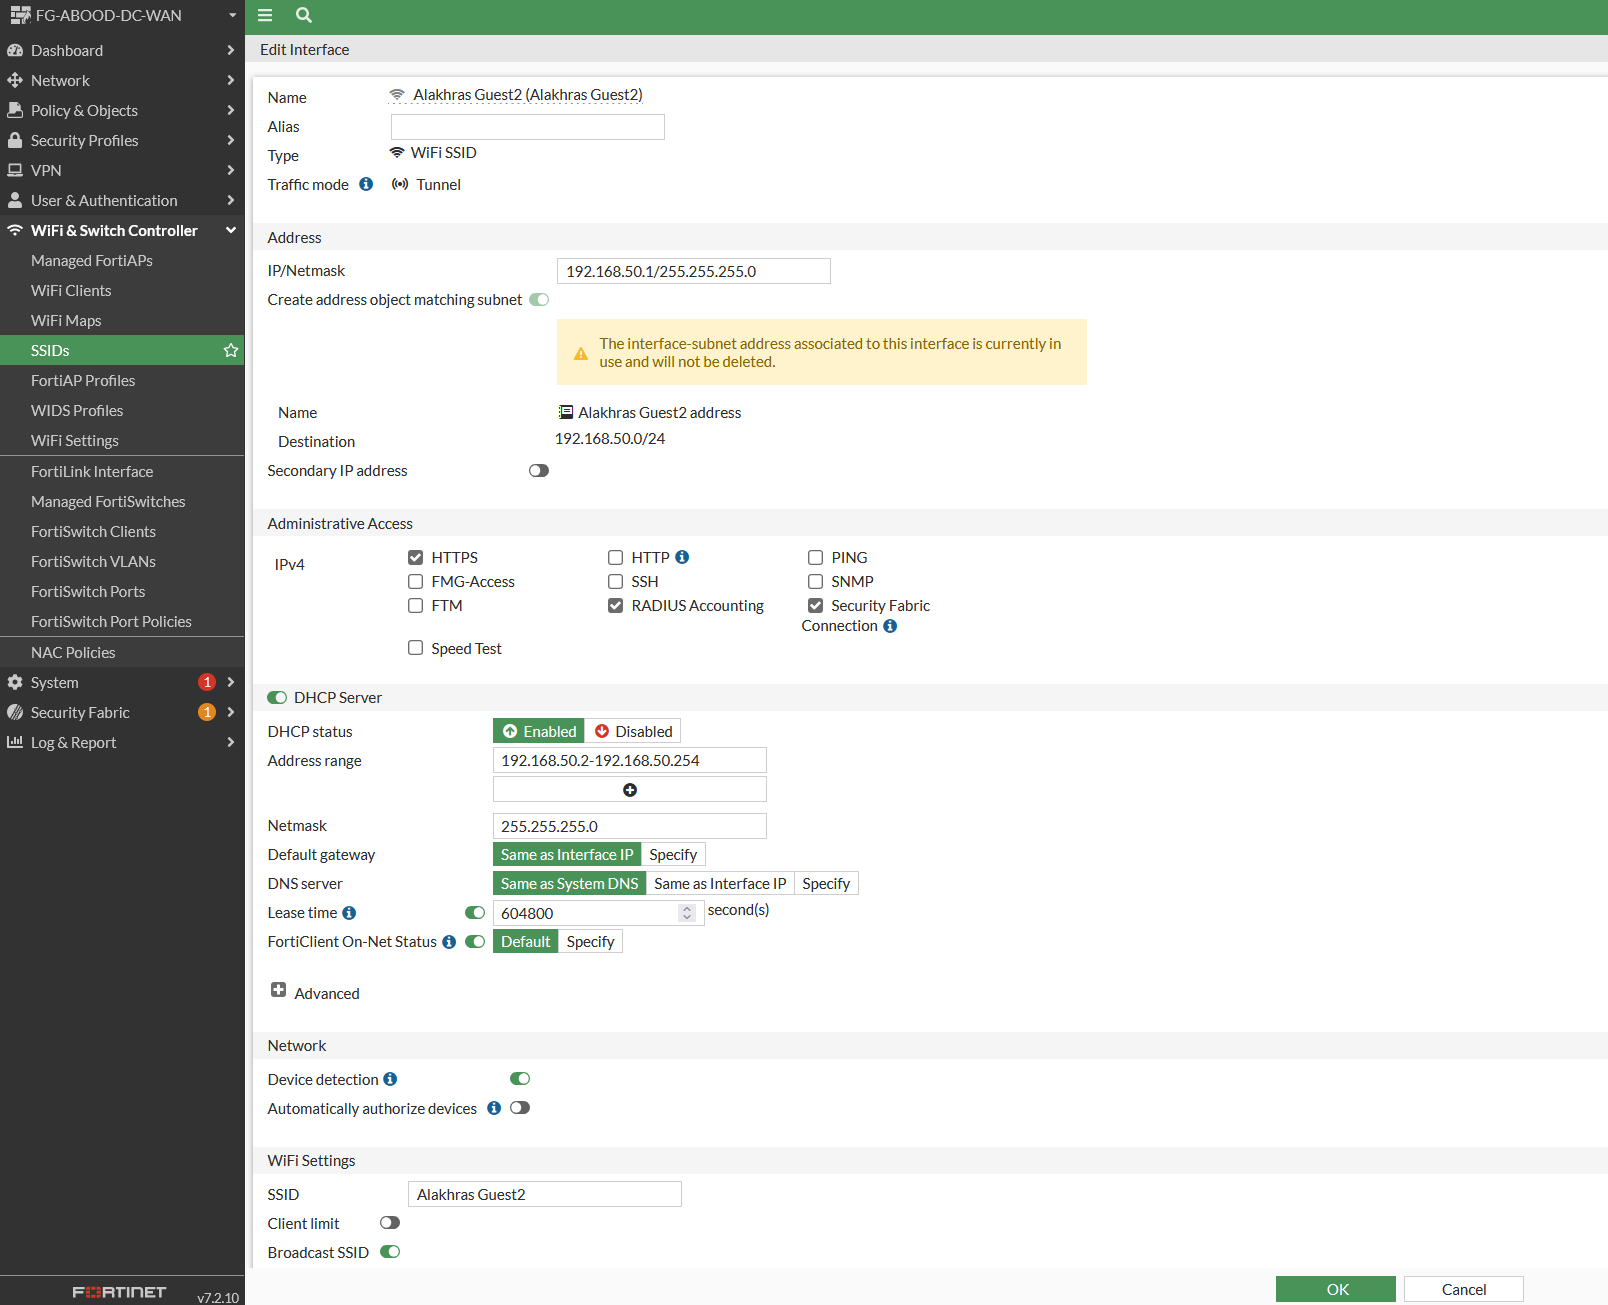
Step 2: Create a New SSID
Configure the SSID in Tunnel Mode with the following settings:
- Security Mode: Captive Portal
- Portal Type: Authentication
- Authentication Portal: Local
- User Groups: Guest-Portal (the earlier created group)
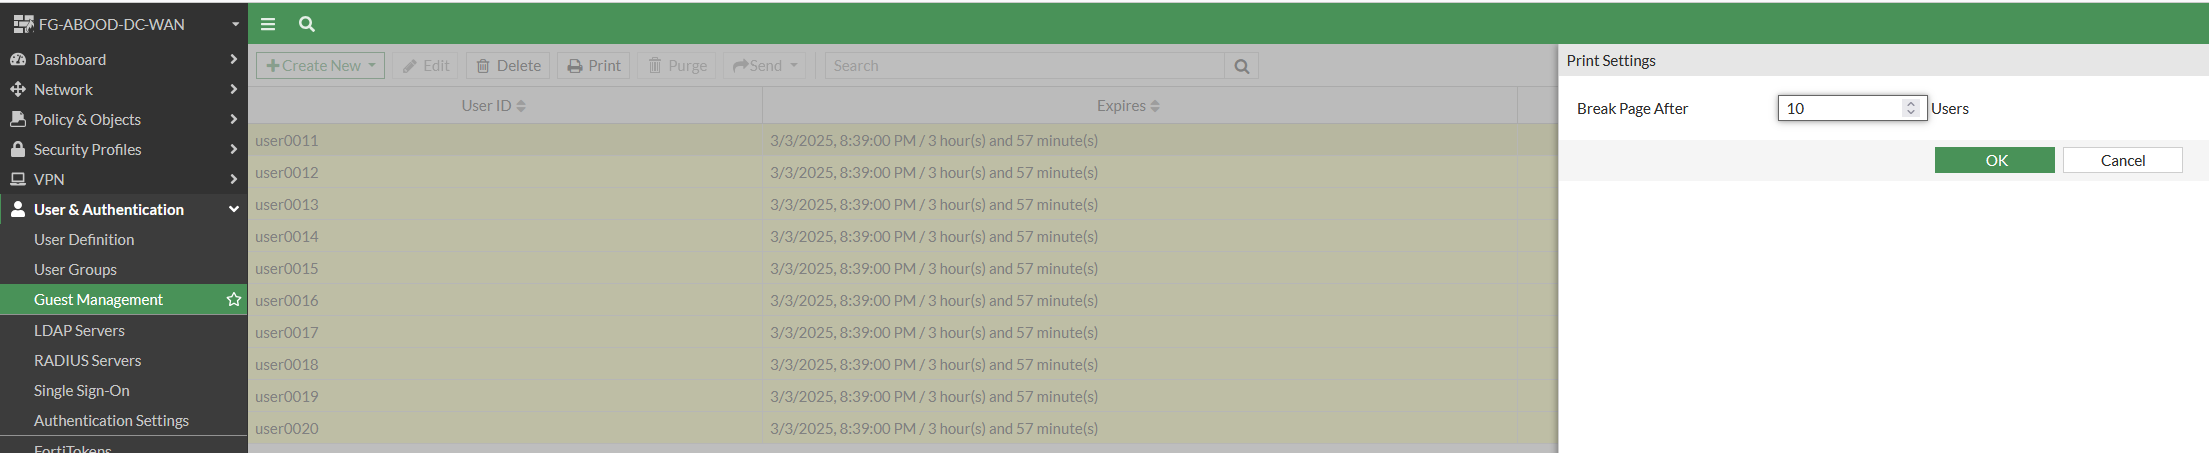
Step 3: Create User Accounts in Bulk
- Navigate to User & Authentication → Guest Management → Create New → Multiple Users. The accounts will be generated in bulk.
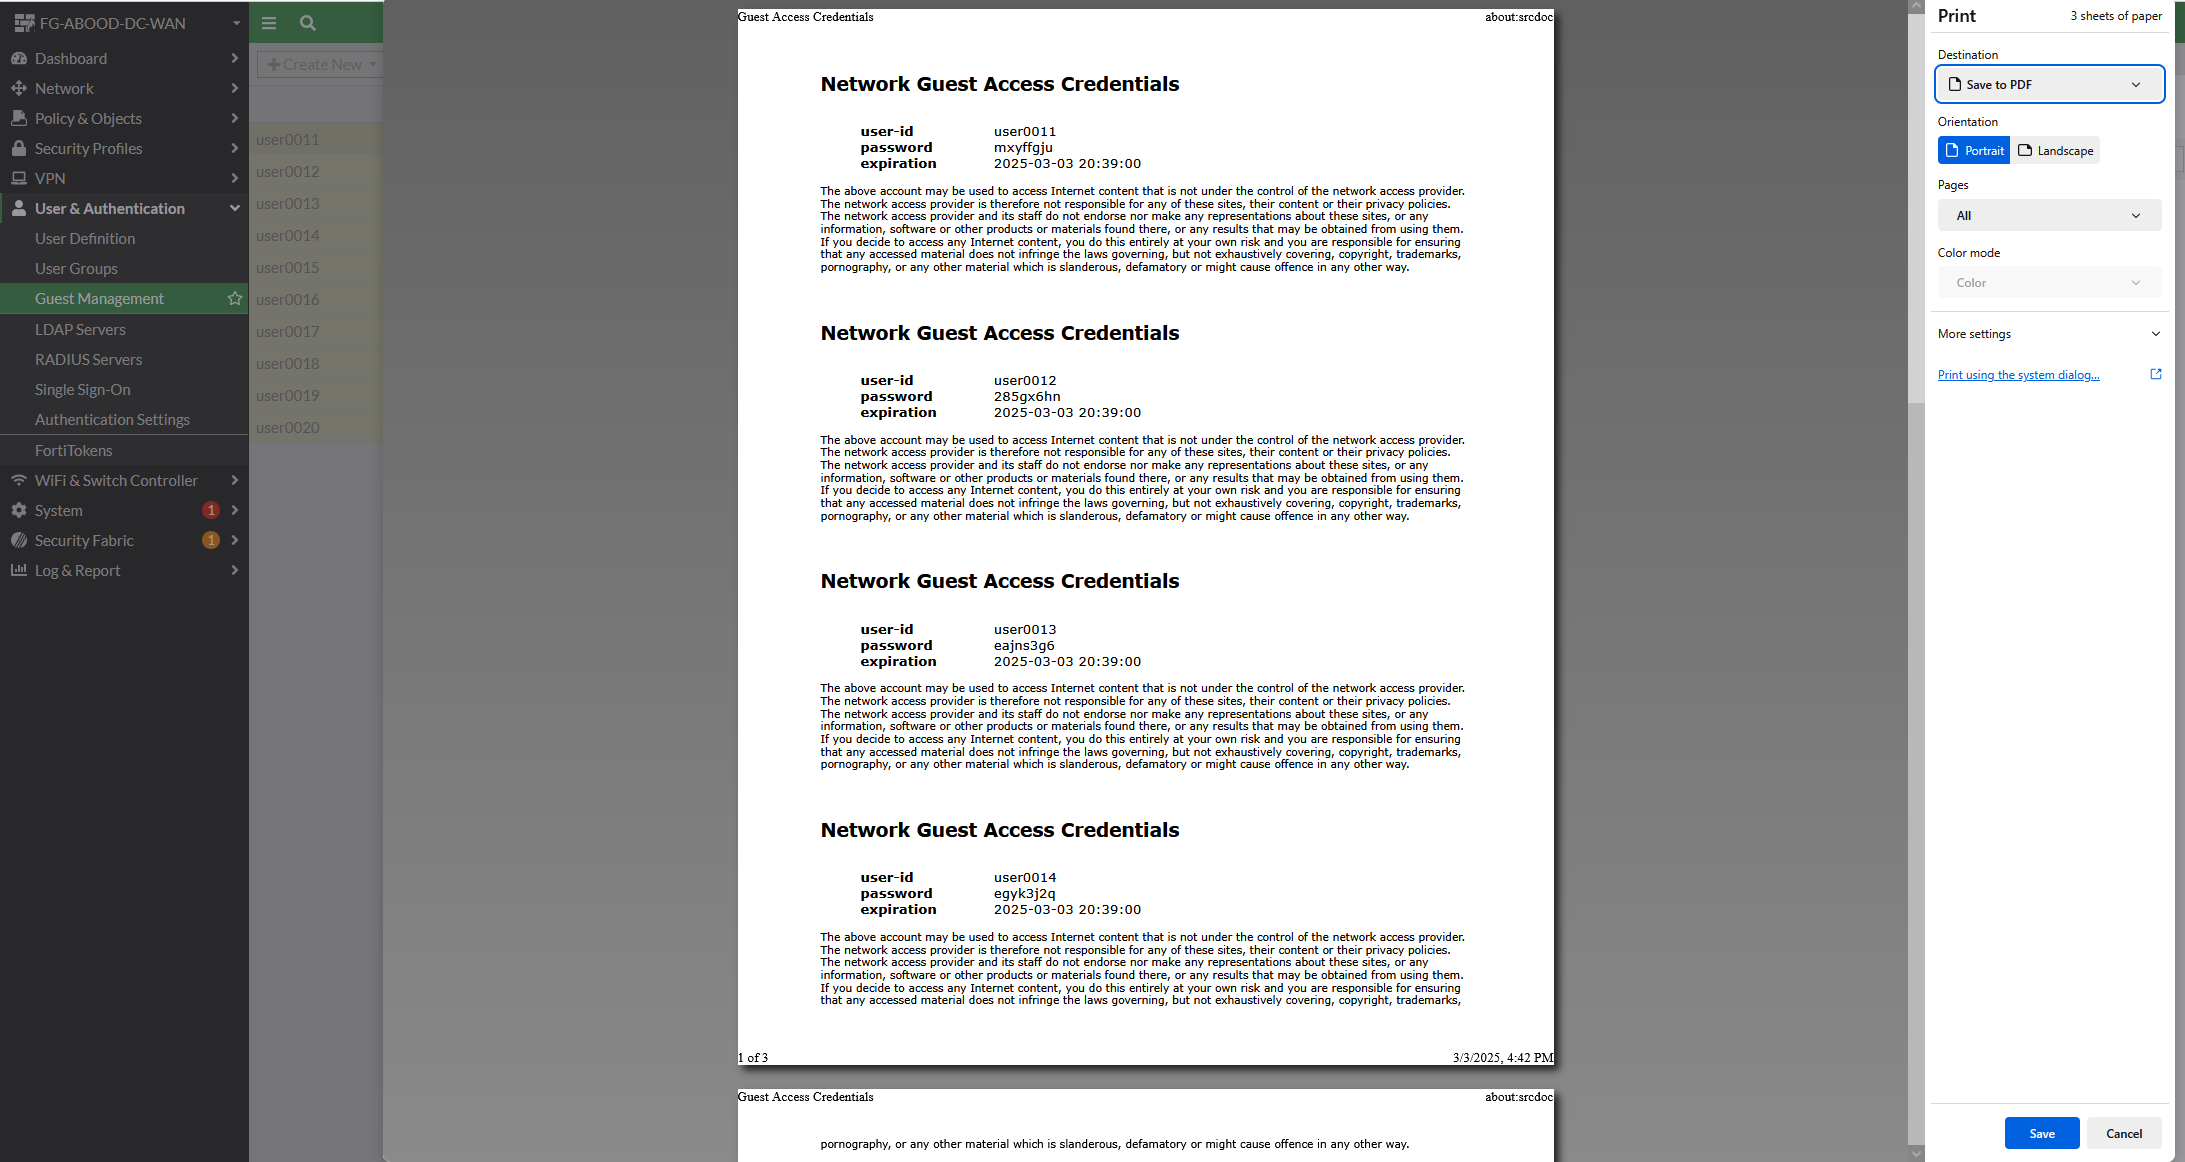
- Print the created accounts to provide on-demand to end users.
Step 4: Create a Firewall Policy
- Allow guest access to the internet. The below policy is for illustration purposes only. Best practice in creating a firewall policy need to be followed, in terms of inspection and required sources and destinations.
- Configure additional settings to resolve the guest portal address and trust the web certificate (to be discussed in a later section).

Captive Portal with Email Address Only (Less Preferred Option)
This option is less preferred, as publicly granting access to networks with just an email address is not ideal, even with strict guest network settings. However, it can be viable for retail use.
Step 1: Enable Email Collection
Under Feature Visibility allow email collection.
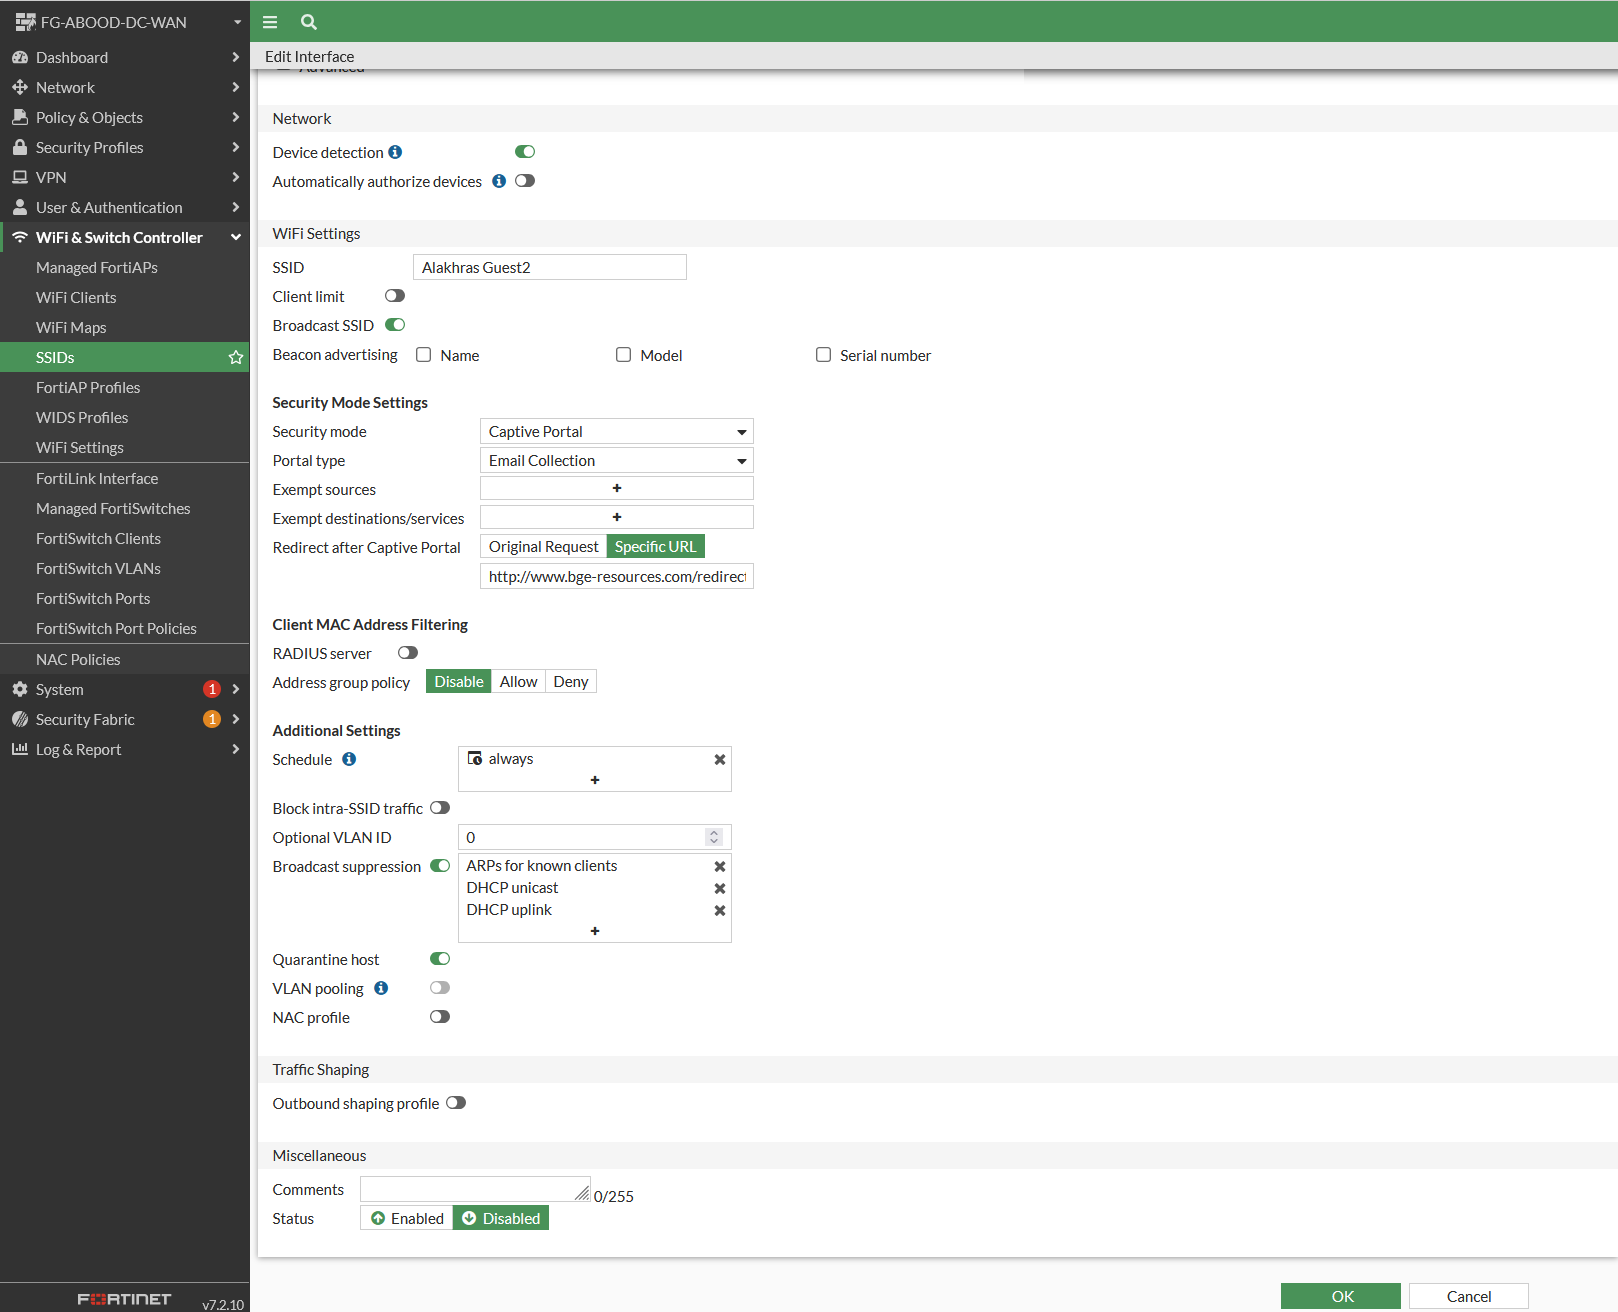
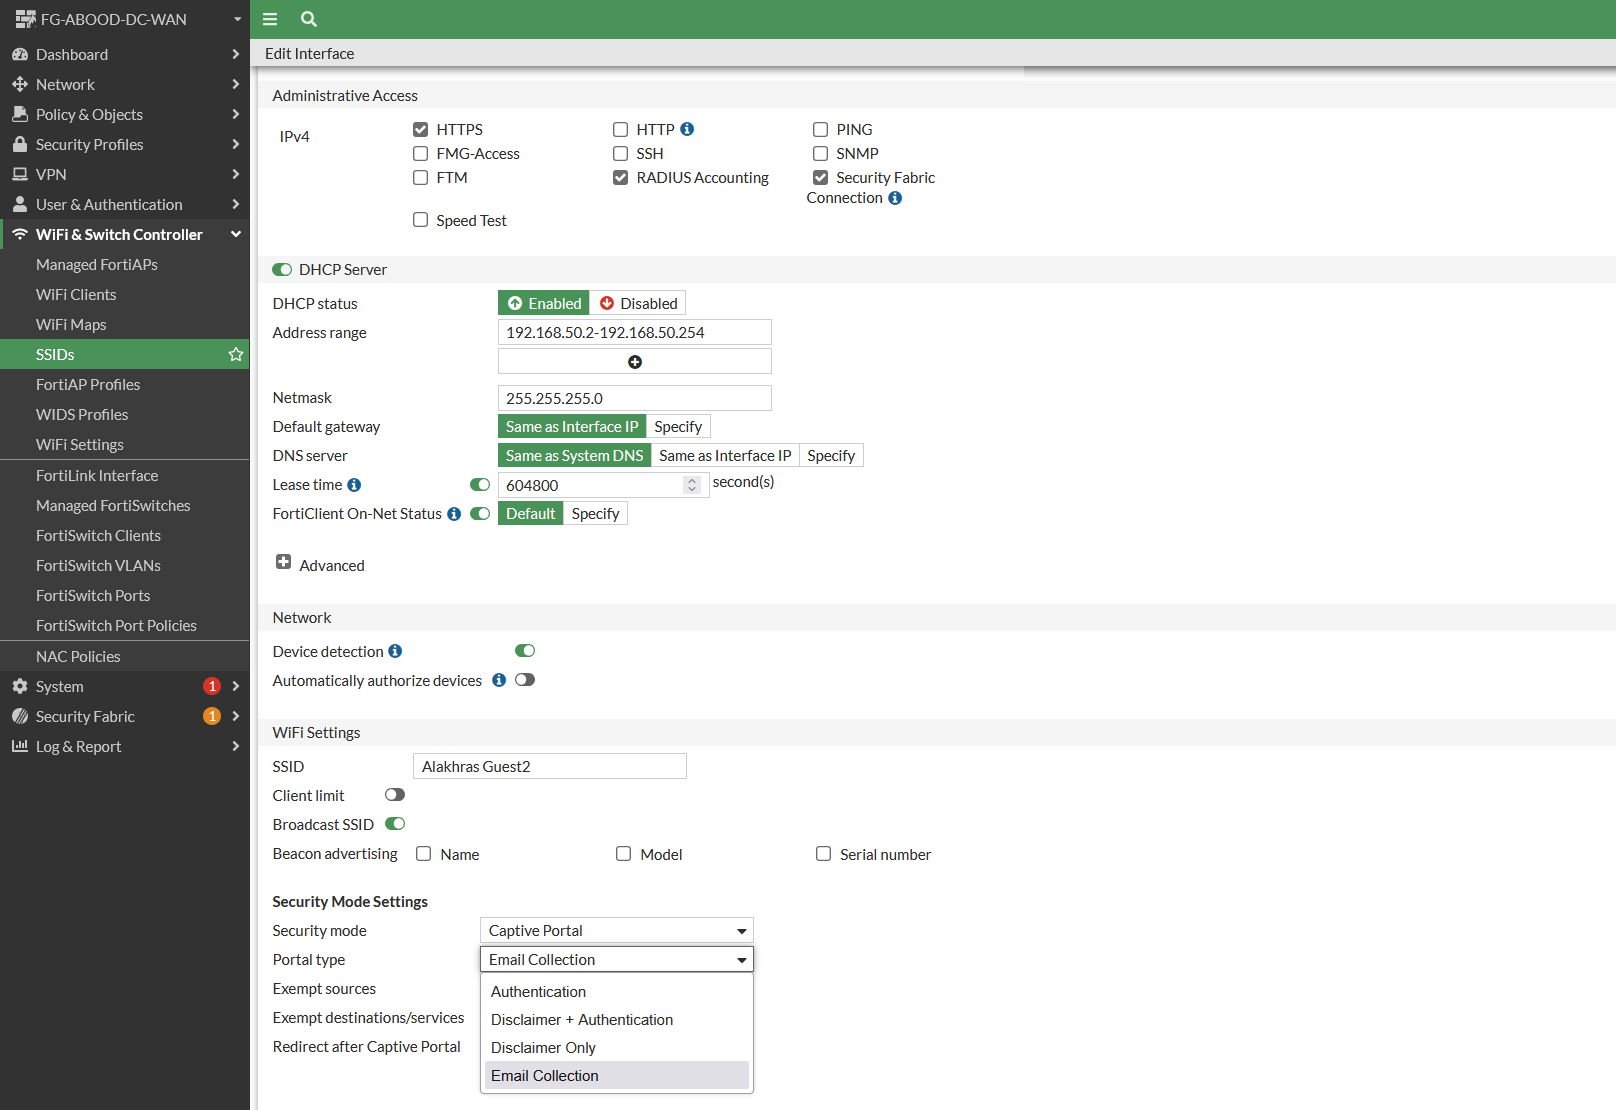
Step 2: Update SSID Settings
Change the Portal Type under the SSID settings to Email Collection.
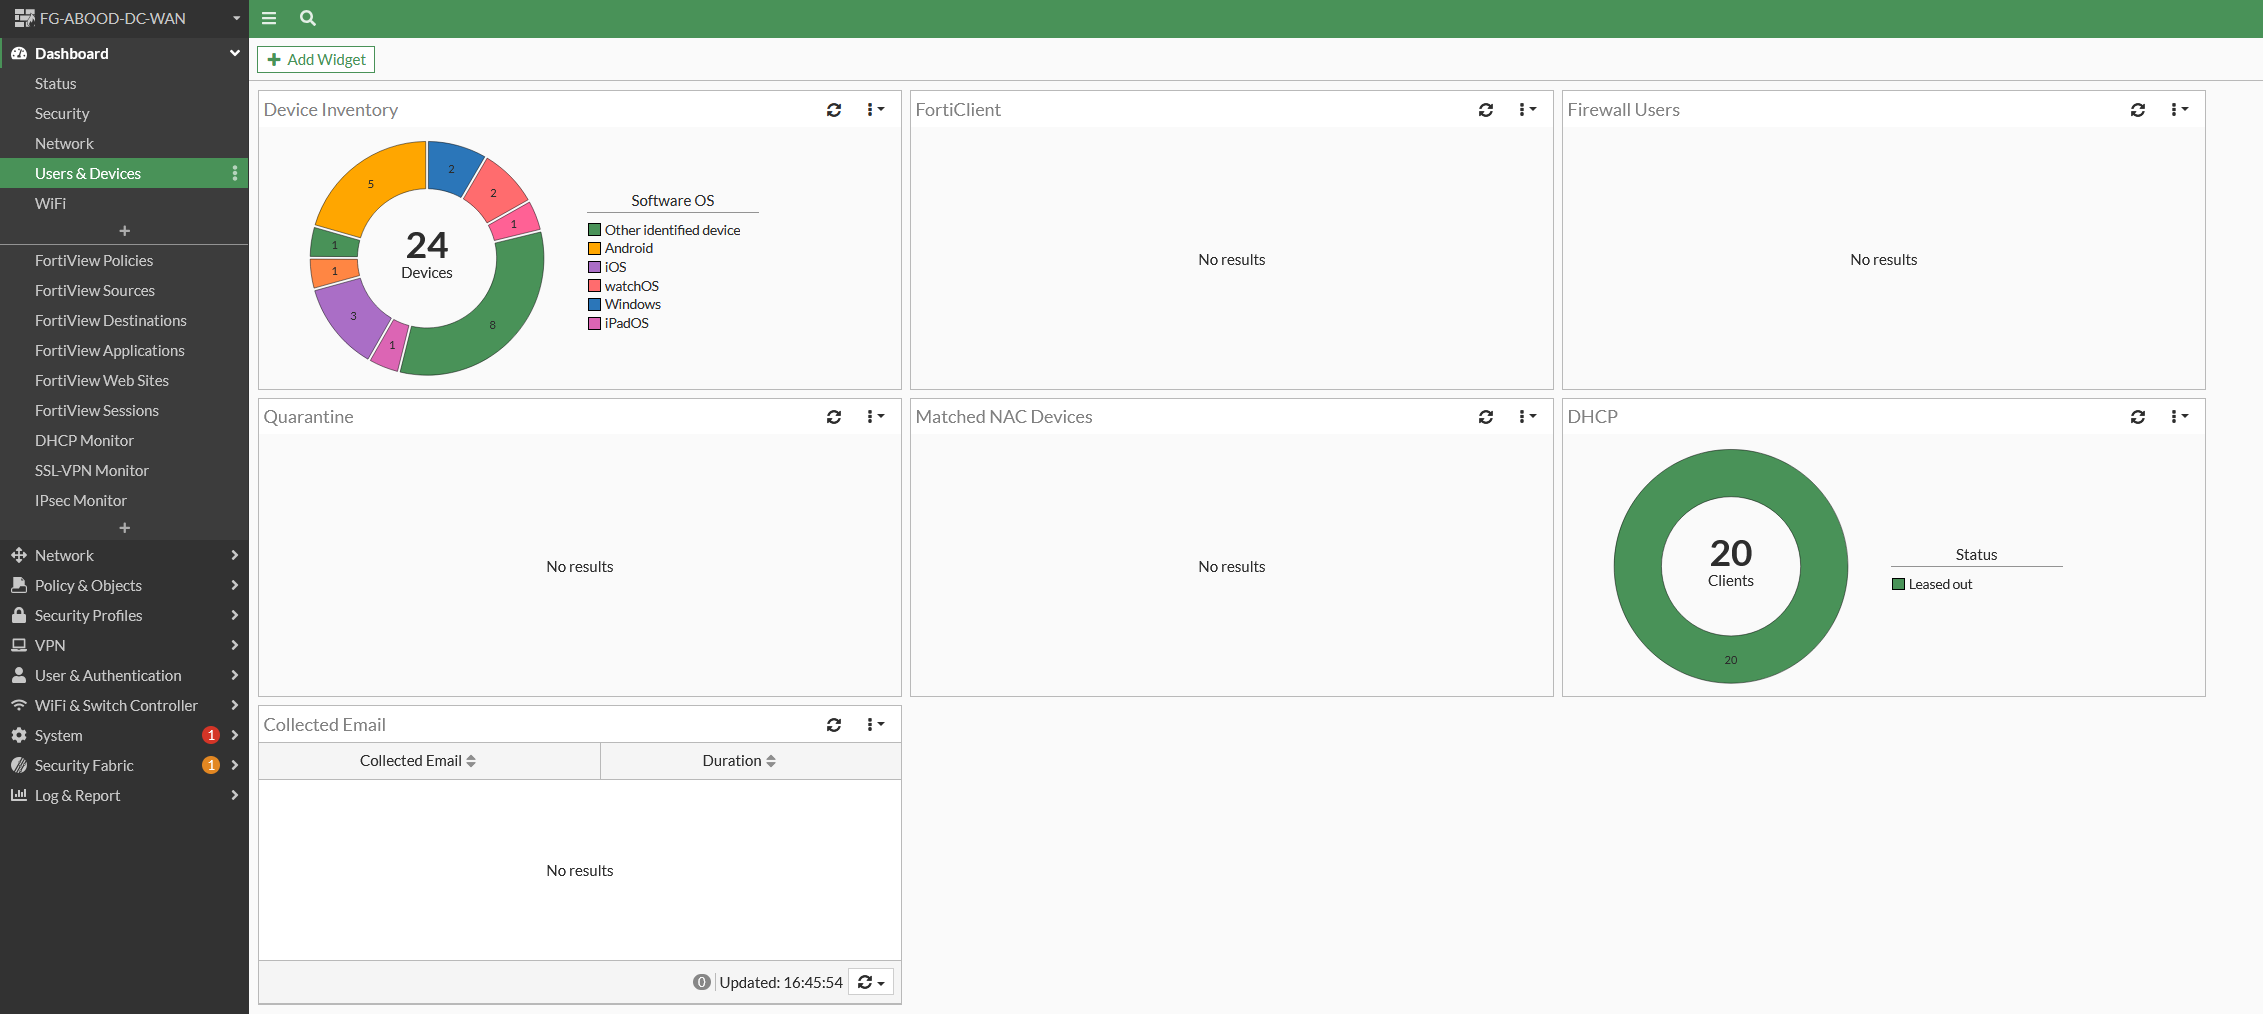
Step 3: Add Device Management Widget (Optional)
Add a widget to manage devices with listed email addresses. Under Dashboard > Users & Device > Add Widget
Step 4: Update the Firewall Policy
In CLI, allow “email-collect” under the firewall policy for guest traffic to the internet:
FG-ABOOD-DC-WAN # config firewall policy
FG-ABOOD-DC-WAN (policy) # edit 7
FG-ABOOD-DC-WAN (7) # show
config firewall policy
    edit 7
        set name "GuestWiFi"
        set uuid bb2c74d4-29c9-51ee-b1e5-c452b399da9f
        set srcintf "Alakhras Guests" "Alakhras Guest2"
        set dstintf "WAN"
        set action accept
        set srcaddr "Alakhras Guests address" "Alakhras Guest2 address"
        set dstaddr "all"
        set schedule "always"
        set service "ALL"
        set logtraffic all
        set nat enable
        set email-collect enable
    next
end
FG-ABOOD-DC-WAN (7) #
Other Required Settings
Customize the Login Portal Page
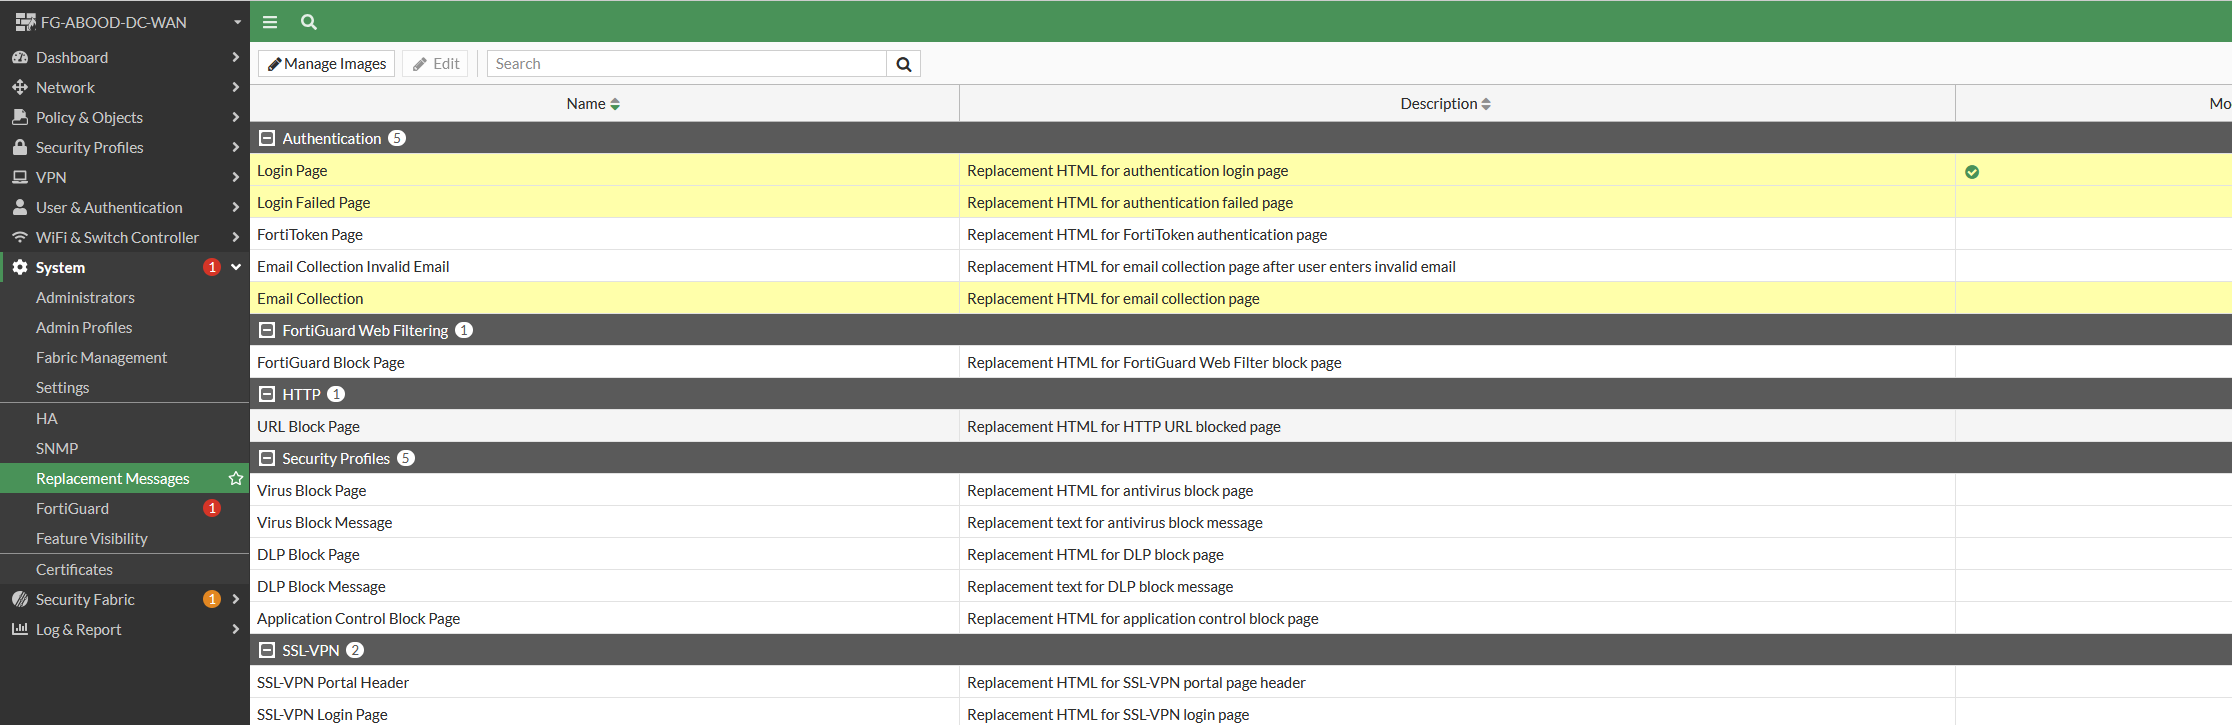
The portal can be customized under System → Replacement Messages:
- Option I : Login Page/Failed Login Page: Customize the HTML pages for username/password login.
- Option II : Email Collection/ Email Collection Invalid Email HTML pages for email collection login.
- Manage Images: Add images for the login portal.
Lets say id like to add a logo I have in .png format to appear on login page. System > Replacement Messages > Manage Images > Create New
Take note of the logo name you are using “mylogo”, as this will be referenced in the HTML page later to load your new logo.
![]()
The logo along with the portal “Login Page” can be tailored by modifying the HTML page easily:
![]()
The rest of the HTML pages can be tailored in the same approach. The changes are dynamic and visible while you edit. You don’t have to be a web developer to do minor changes to tailor your login page 😀
Resolve the Guest Portal Address
Its important to know that the guest portal resolves to the Guest SSID Gateway Interface IP. Two configurations are required:
- DNS Entry:
- Enable DNS Database in Feature Visibility.
- Allow DNS service on the Guest Interface.
- Create a DNS Zone with the customer domain name (e.g., customerx.com) and an A record for the guest portal (e.g., guest.customerx.com).
The above can be executed from either the GUI under Network > DNS Servers or from the CLI like below:
FG-ABOOD-DC-WAN (netsecops) # show
config system dns-database
    edit "netsecops"
        set domain "net-sec-ops.com"
        set authoritative disable
        config dns-entry
            edit 1
                set hostname "guest"
                set ip 192.168.50.1
            next
        end
    next
end
- Trusted Certificate:
- Import a trusted certificate (e.g., a wildcard certificate for customerx.com) into the FortiGate that has the FQDN address as SN.
- Configure the Guest SSID interface in CLI to use the FQDN (that resolves to the Guest SSID L3 Gateway) and certificate:
config wireless-controller vap
    edit "Alakhras Guest2"
        set ssid "Alakhras Guest2"
        set security captive-portal
        set portal-type email-collect
        set security-redirect-url "http://www.net-sec-ops.com/redirect-url/"
        set auth-cert "abood-dc-wan.net-sec-ops.com"
        set auth-portal-addr "guest.net-sec-ops.com"
        set schedule "always"
    next
end
Managing Guest Users
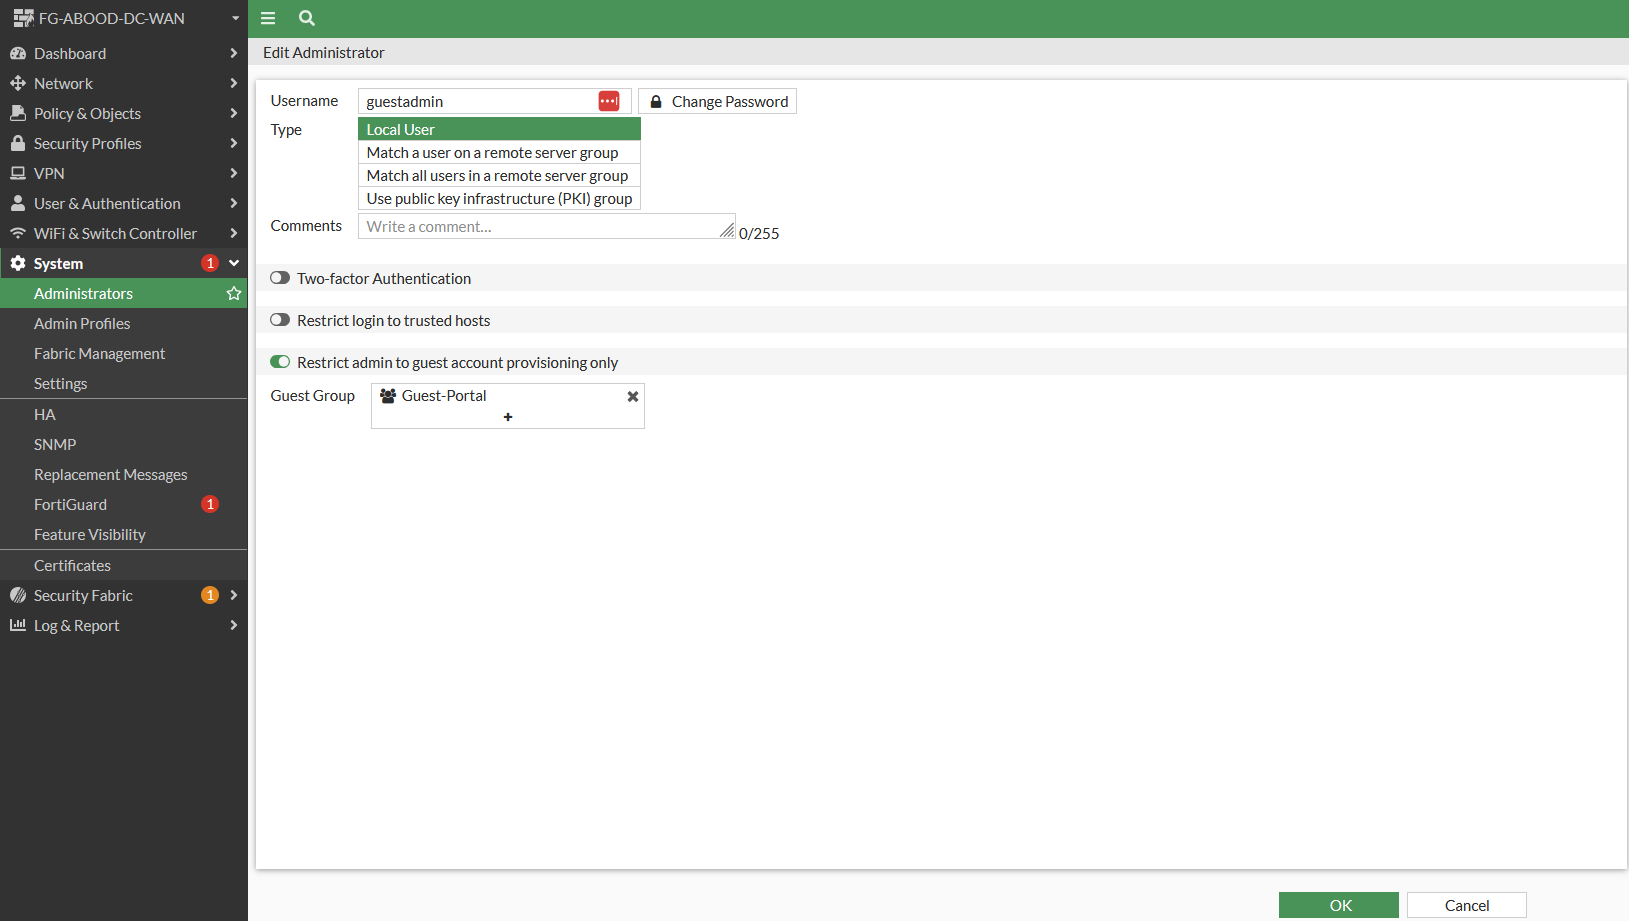
If the customer wishes to manage guest user accounts, create a guest admin account tied to a trusted host subnet. This allows the admin to log in and access only the Guest Management section of the FortiGate interface.