Block sensitive data leak to ChatGPT example
DLP (Data Leak Prevention) has become increasingly crucial with the rise of LLM AI platforms. Many users rely on AI chat platforms to simplify both their work and personal tasks.
While this convenience is beneficial, it also raises the risk of unintentionally exposing sensitive organizational information. LLM models can incorporate leaked data into their training sets, potentially making it part of responses to external users which in return significantly increasing security risks.
A notable example is the Samsung data leak to ChatGPT: To learn more about this data leak, check:Samsung Bans ChatGpT for employees after Sesitive Code leak
A comprehensive DLP solution can effectively address these challenges. But what if a customer has a FortiGate firewall and wants to leverage its DLP capabilities to mitigate these risks?
Pre-requisites
- Keyword and Data Samples: Ensure a predefined list of keywords and data samples available for DLP matching.
- Proxy-Based Firewall Policy with Deep SSL Inspection:
- Endpoints must trust the Fortinet CA SSL certificate used for deep inspection.
- Certificate distribution can be managed via an MDM or onboarded using FortiClient EMS as part of the Fortinet Security Fabric.
- DLP Security Profile: Configure a DLP security profile and attach it to the firewall policy.
- Blocking QUIC Protocol:
- When using a DLP profile in a proxy-based firewall policy, it’s recommended to block the QUIC protocol in application control profiles. By default, FortiOS 7.0–7.2 can only inspect QUIC traffic in HTTP/3 in flow mode. Explicitly blocking QUIC in application control forces most traffic on UDP/443 to revert to TCP/443, allowing FortiGate to properly inspect it.
Procedures
Step 1: Determine what do you want to prevent from leaking
In this example I will prevent leaking to chatGPT the following:
- Any text/keyword that contains “abood”.
- Any IP address that matches the subnet 1.1.1.0/24 as an example.
This will be matched using regex. Tools such as https://regex101.com can help fine tunning the pattern you are after.
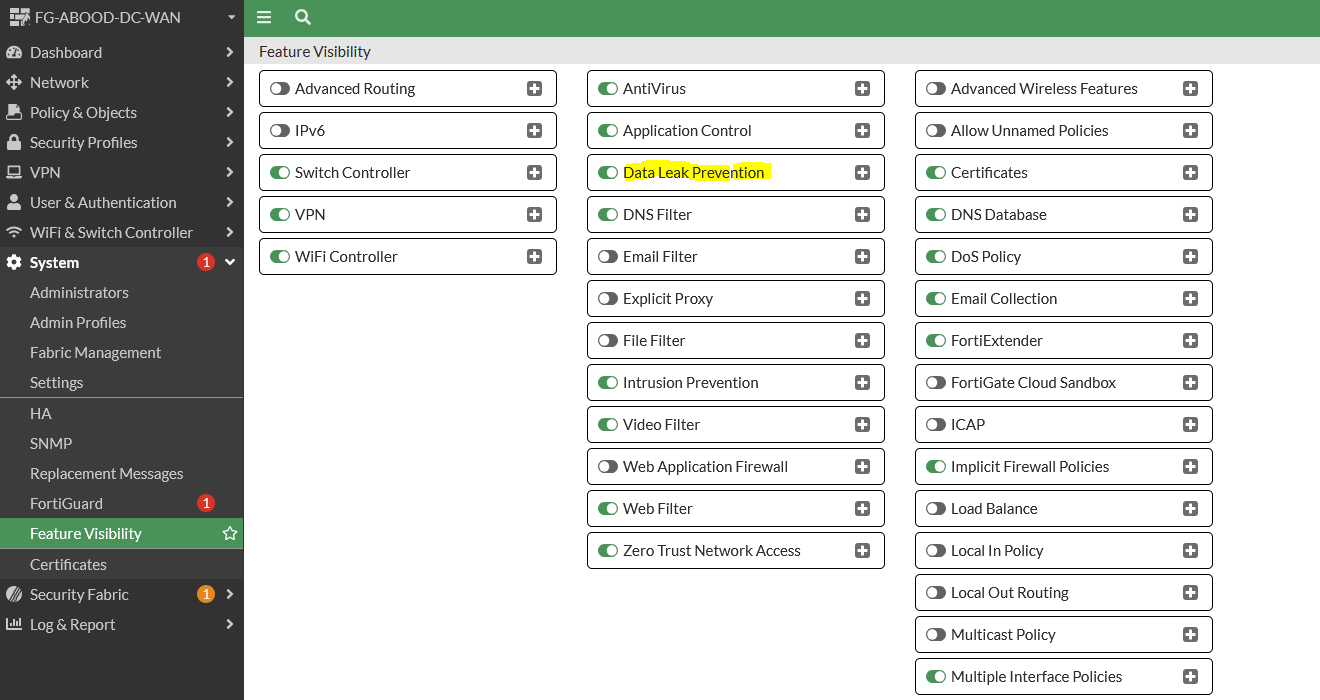
Step 2: Enable DLP
Enable Data Leak prevention under feature visibility.
Step 3: Create DLP Dictionary
Under Data Leak Prevention create a new DLP dictionary with two dictionary entries to cover the use cases.
- Dictionary entry with type “Keyword” to match “abood” keyword in text.
- Dictionary entry with type “Regex” to match 1.1.1.0/24 a regex match to cover the subnet (any ip within the range)


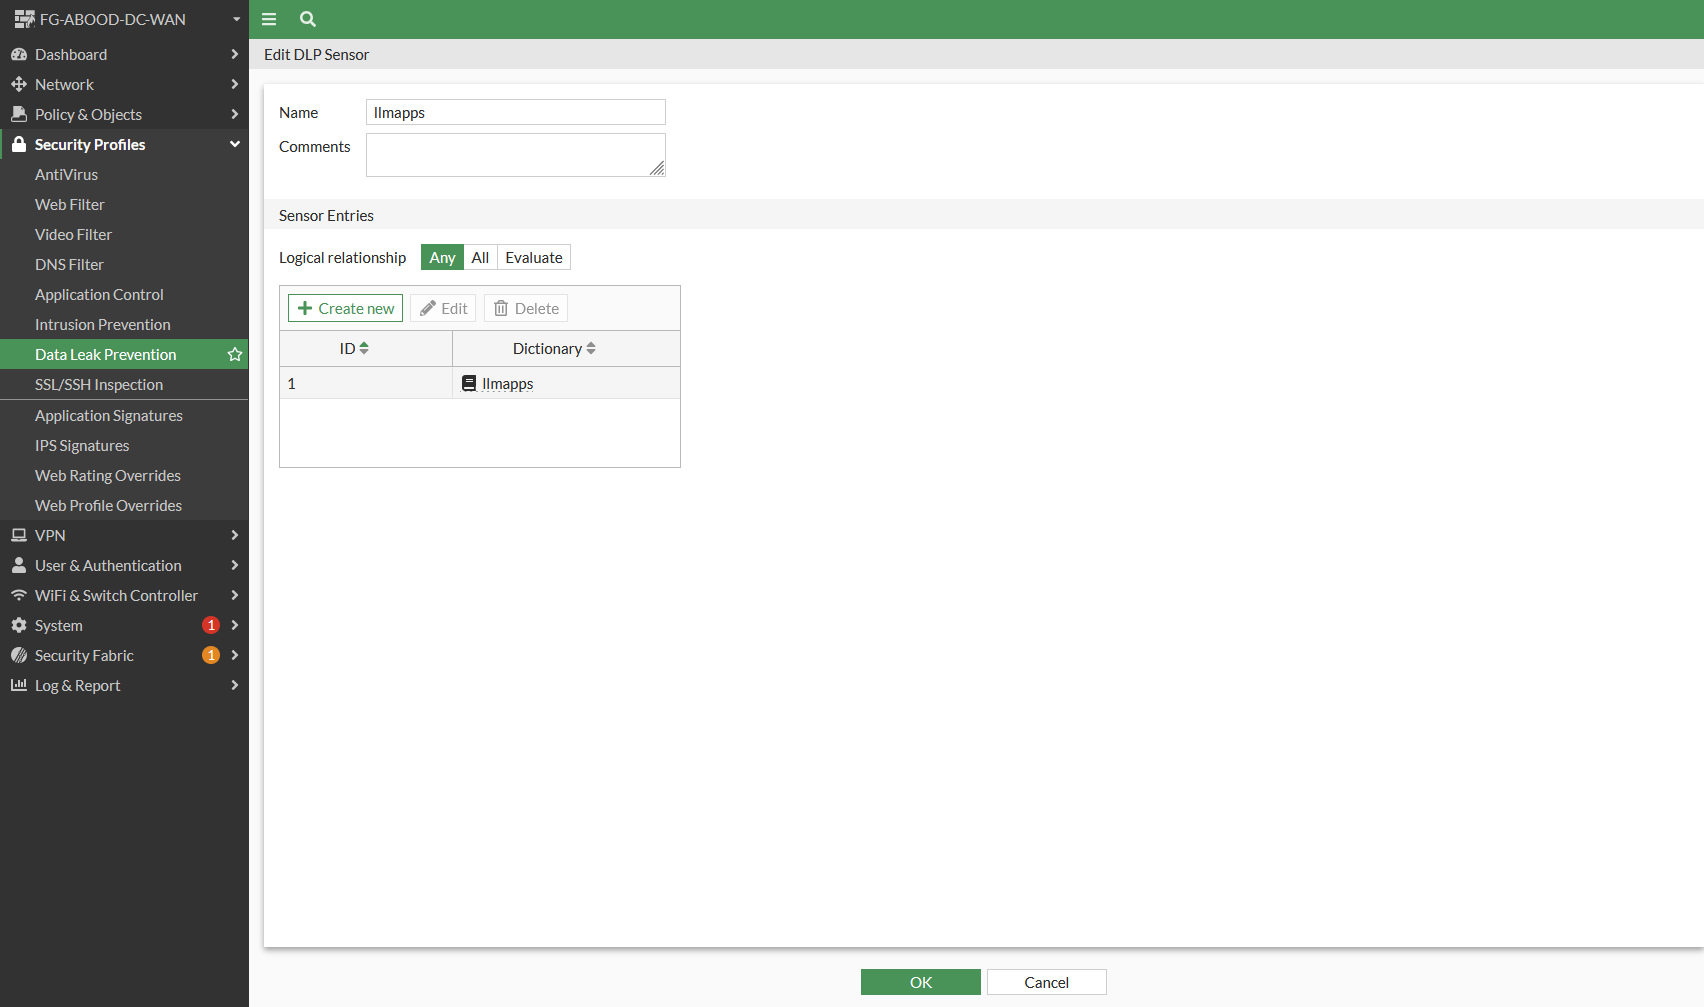
Step 4: Create a DLP Sensor
Under Data Leak Prevention create a new DLP sensor and reference to the dlp dictionary created earlier.

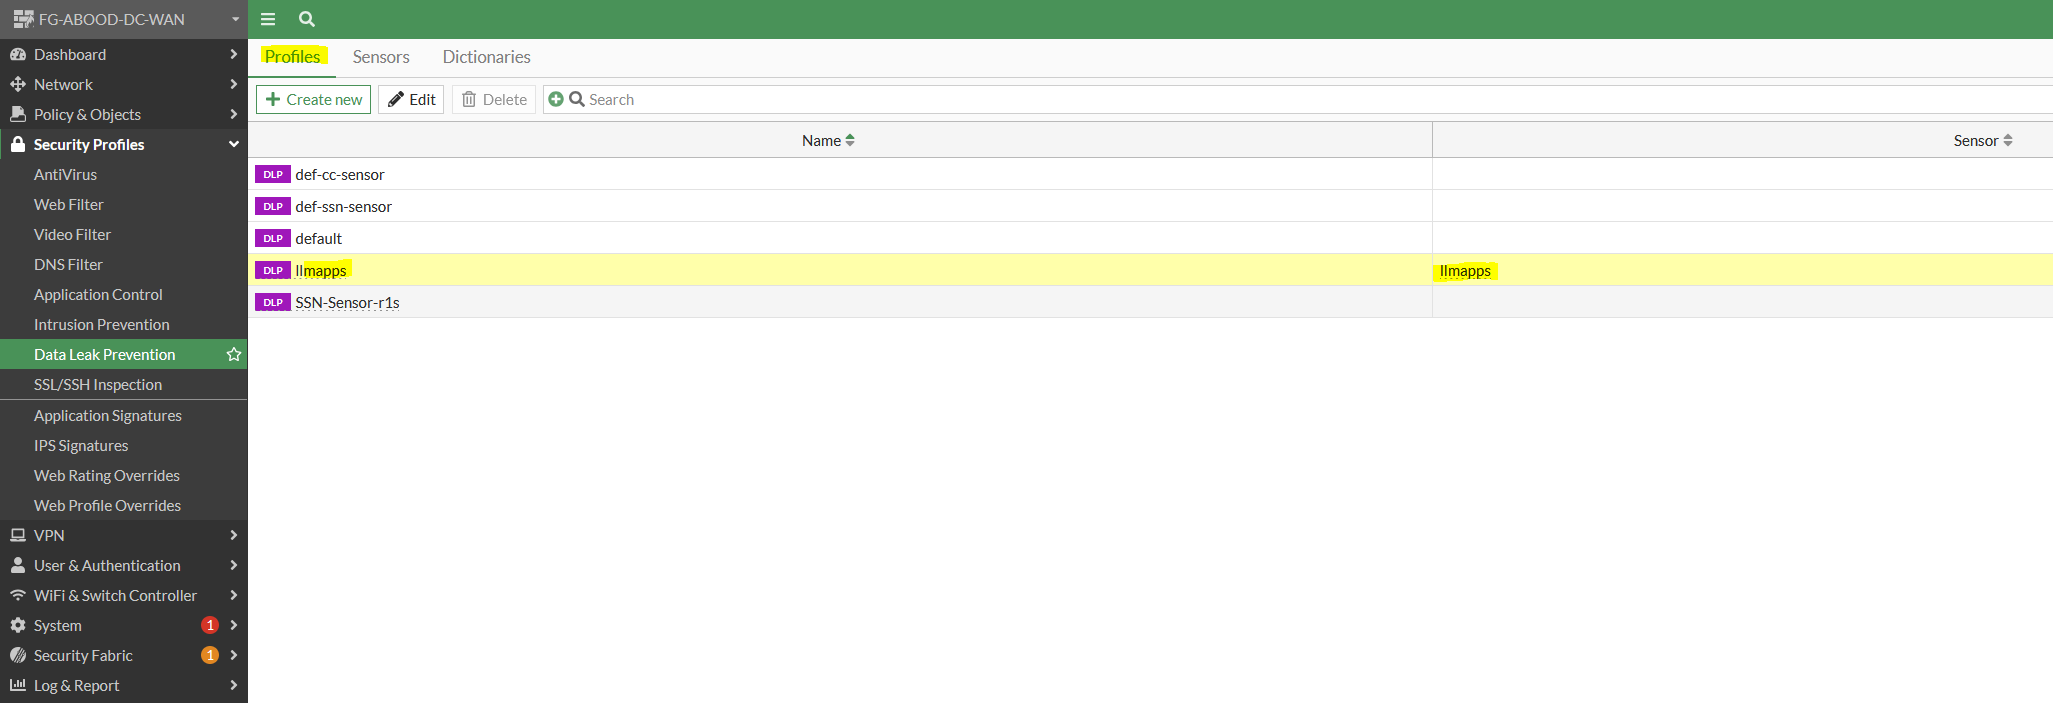
Step 4: Create a DLP Profile
Under Data Leak Prevention create a new DLP profile with two rules as per below referencing the earlier DLP sensor.
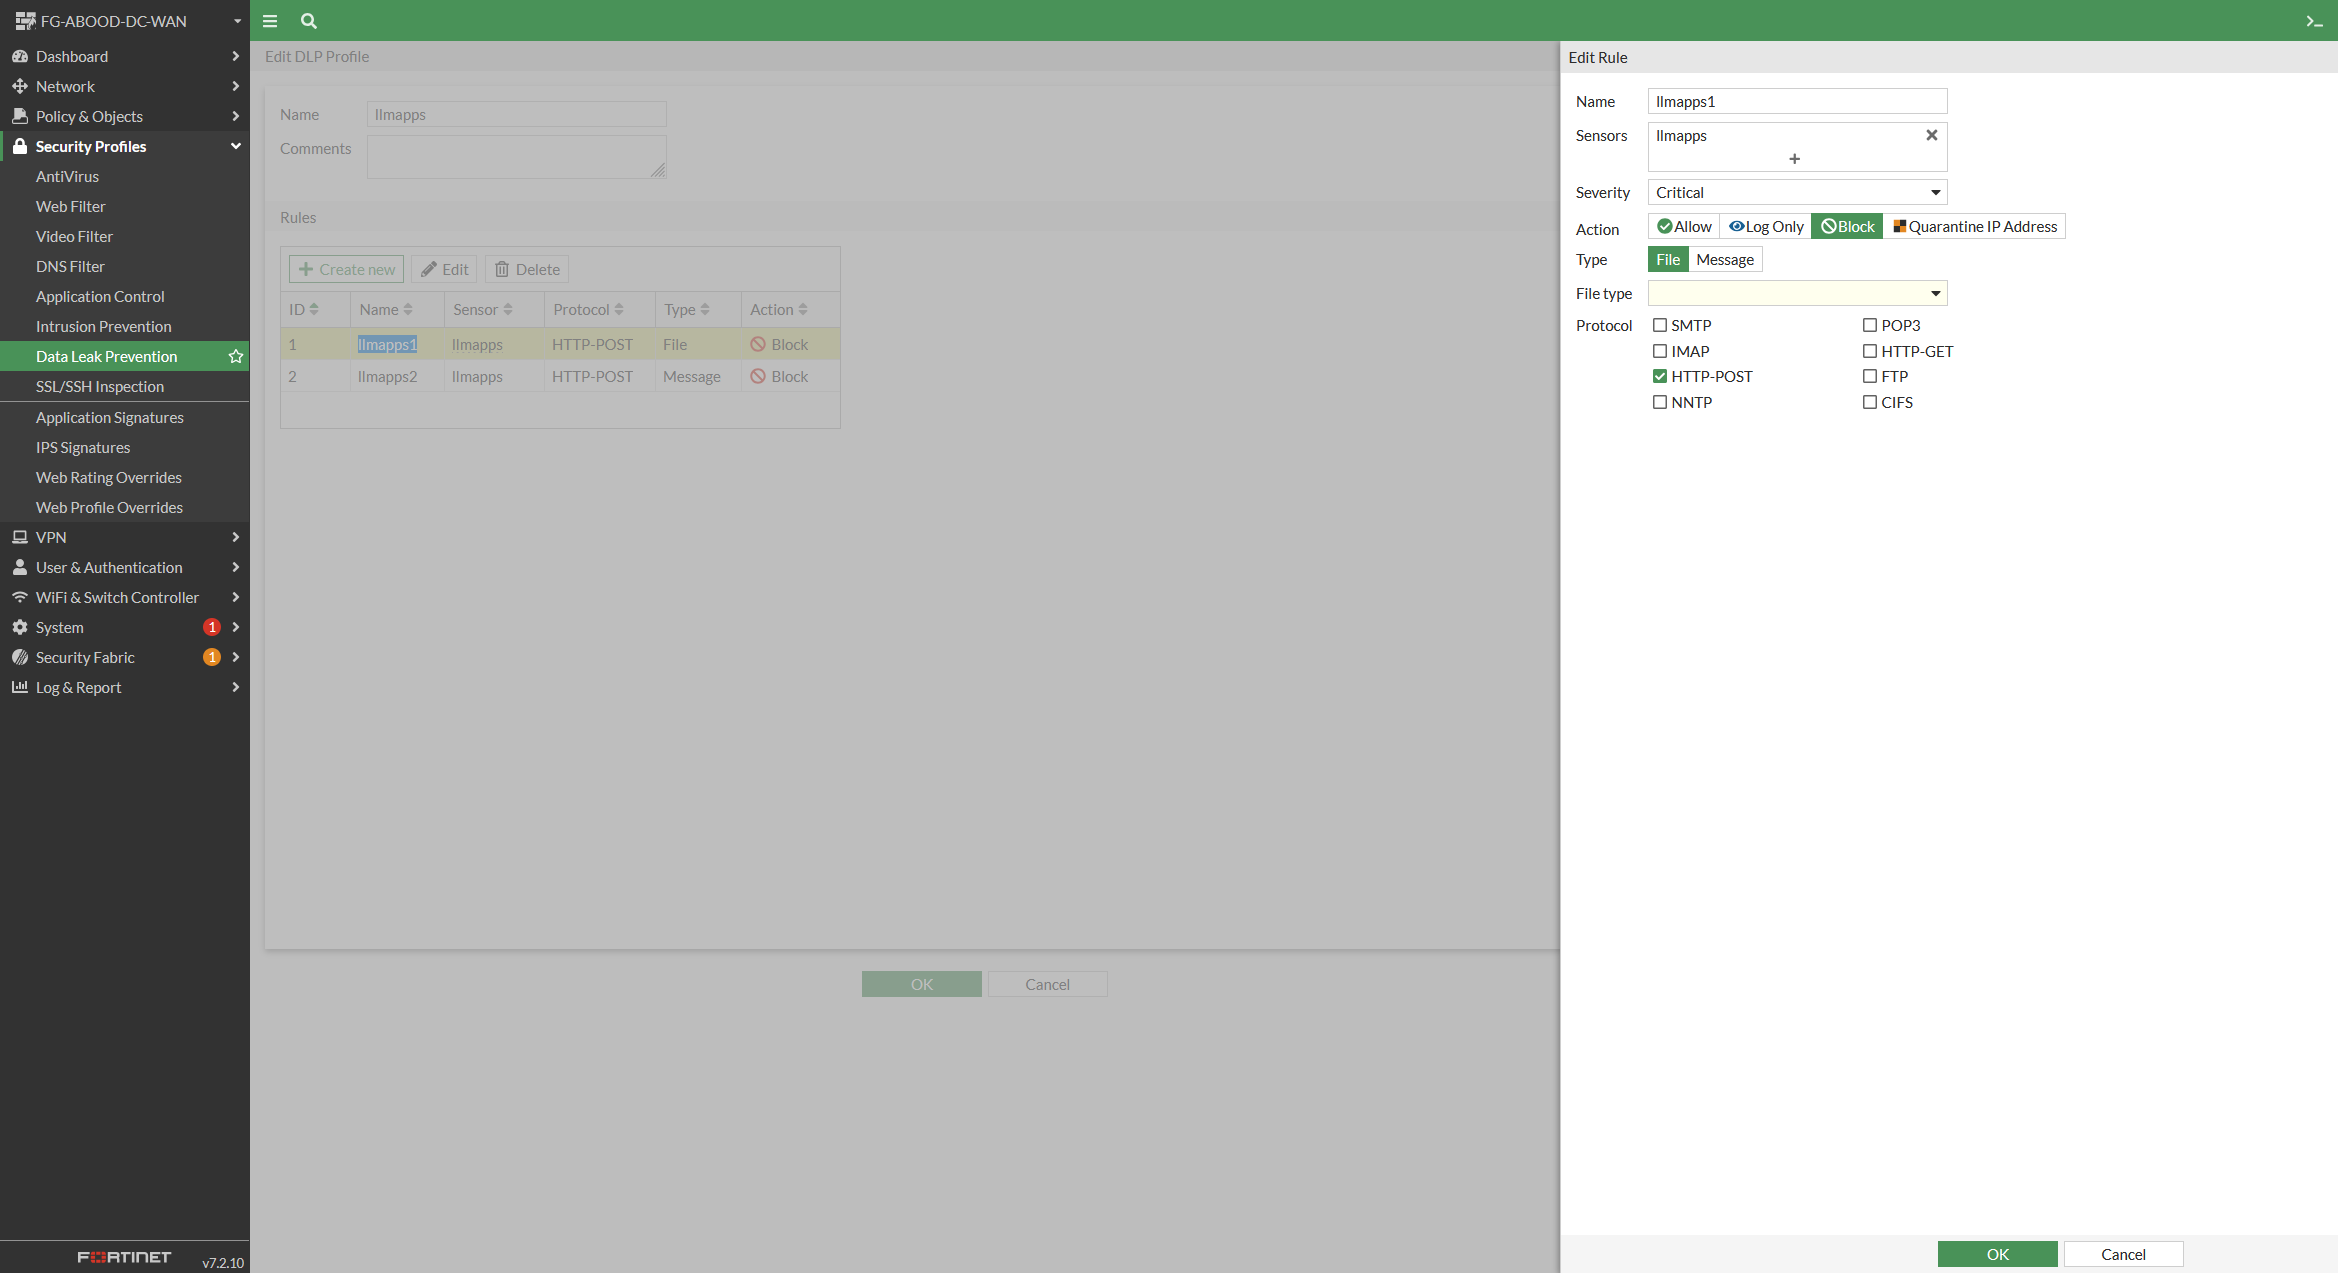
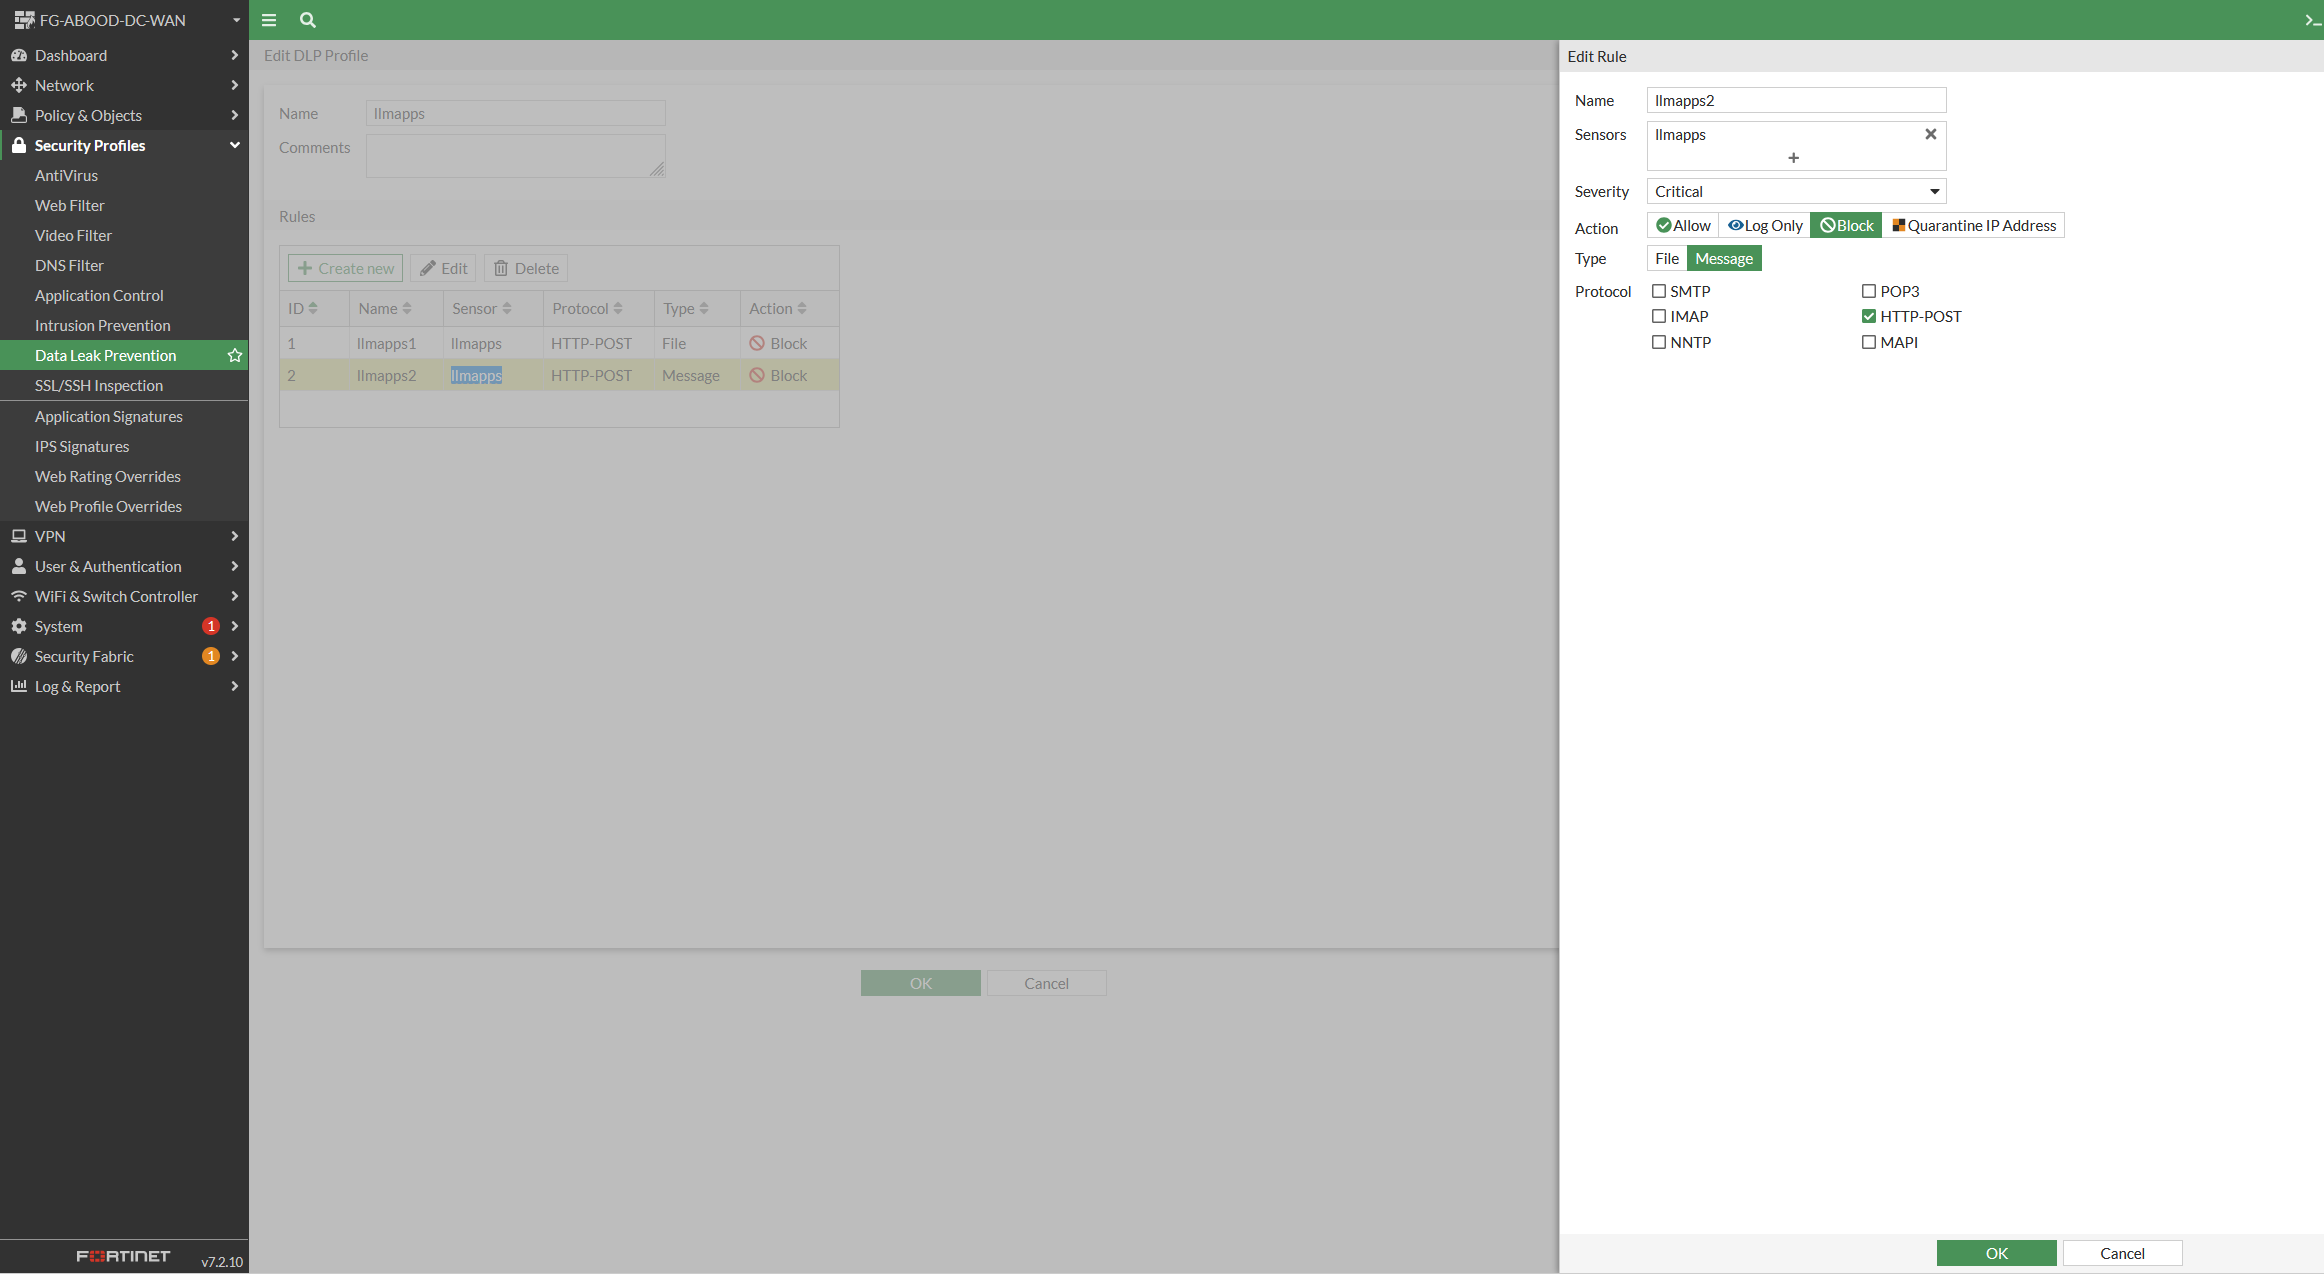
The first rule is with type file, and the second rule is with type message. Applying settings as shown on the GUI
For the first rule (file) On the CLI Unset the file type option to enable filtering of all file types, including unknown ones (unset file-type)
The complete CLI commands for the DLP Dictionary, sensor, profile looks like this
FG-ABOOD-DC-WAN # config dlp dictionary

FG-ABOOD-DC-WAN (dictionary) # show
config dlp dictionary
    edit "llmapps"
        set uuid f24f4ee4-fd65-51ee-0f5e-1f6f999f30d0
        set comment "block leaks to  AI platforms"
        config entries
            edit 1
                set type "keyword"
                set pattern "brennan"
            next
            edit 2
                set type "regex"
                set pattern "\\b210\\.18\\.244\\.(?:\\d{1,2}|1\\d{2}|2[0-4]\\d|25[0-4])\\b"
            next
        end
    next
end

FG-ABOOD-DC-WAN (dictionary) # end

FG-ABOOD-DC-WAN # config dlp sensor

FG-ABOOD-DC-WAN (sensor) # show
config dlp sensor
    edit "llmapps"
        config entries
            edit 1
                set dictionary "llmapps"
            next
        end
    next
end

FG-ABOOD-DC-WAN (sensor) # end

FG-ABOOD-DC-WAN # config dlp profile

FG-ABOOD-DC-WAN (profile) # show
config dlp profile
    edit "default"
        set comment "Default profile."
    next
    edit "sniffer-profile"
        set comment "Log a summary of email and web traffic."
        set summary-proto smtp pop3 imap http-get http-post
    next
    edit "def-cc-sensor"
    next
    edit "SSN-Sensor-r1s"
    next
    edit "def-ssn-sensor"
    next
    edit "llmapps"
        config rule
            edit 1
                set name "llmapps1"
                set severity critical
                set proto http-post
                set filter-by sensor
                set sensor "llmapps"
                set action block
            next
            edit 2
                set name "llmapps2"
                set severity critical
                set type message
                set proto http-post
                set filter-by sensor
                set sensor "llmapps"
                set action block
            next
        end
    next
end

FG-ABOOD-DC-WAN (profile) #
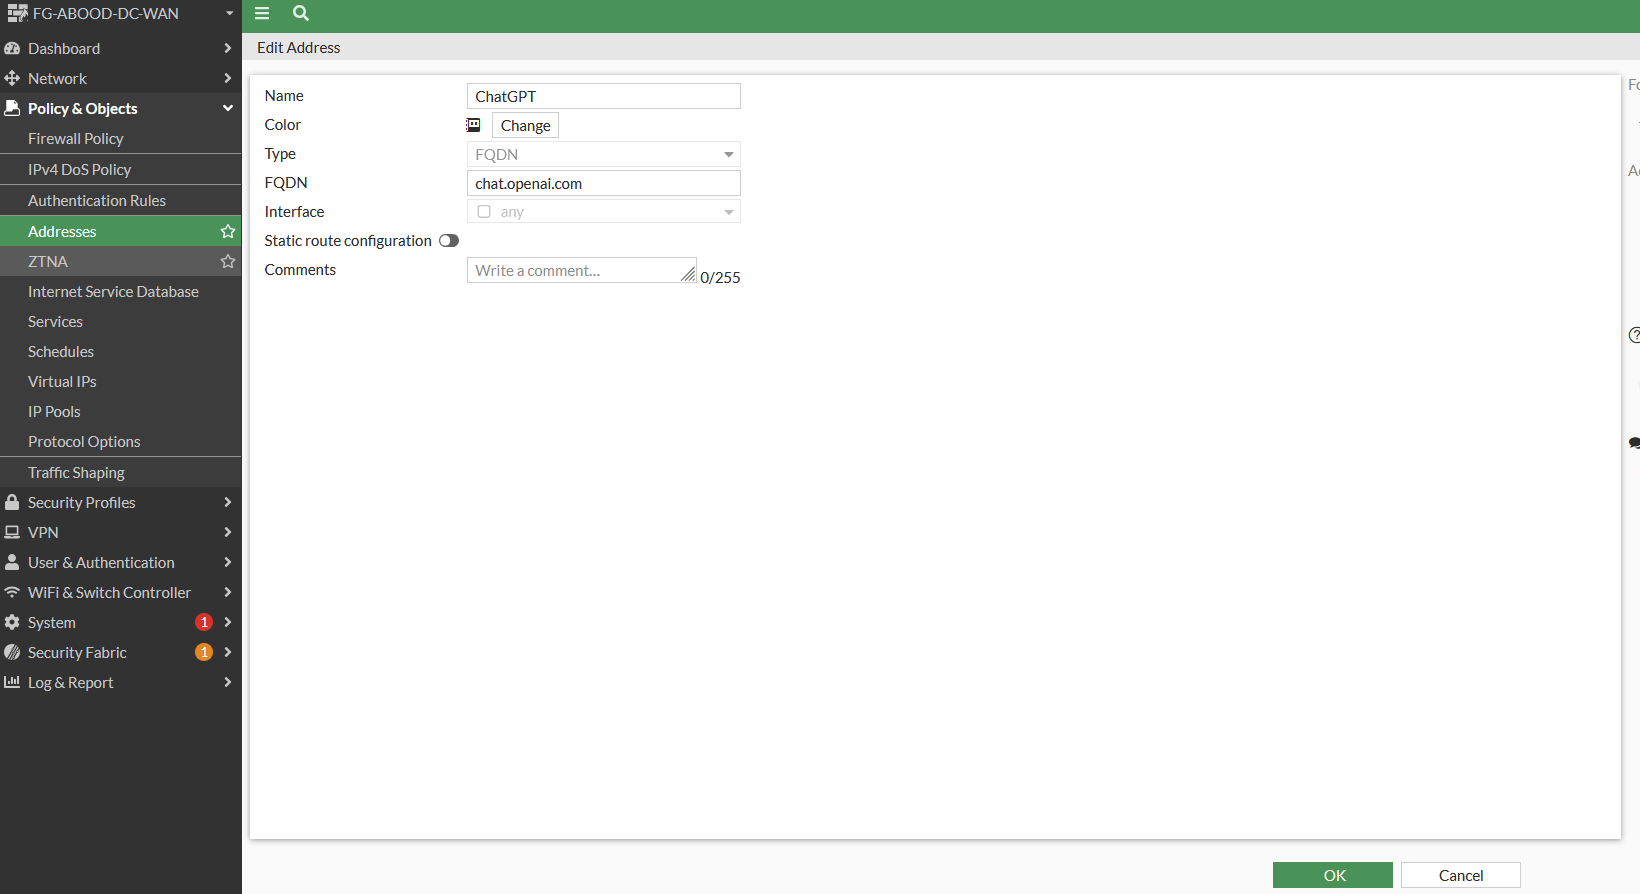
Step 4: Create an address object
Create an address object type “FQDN” for “chat.openai.com”
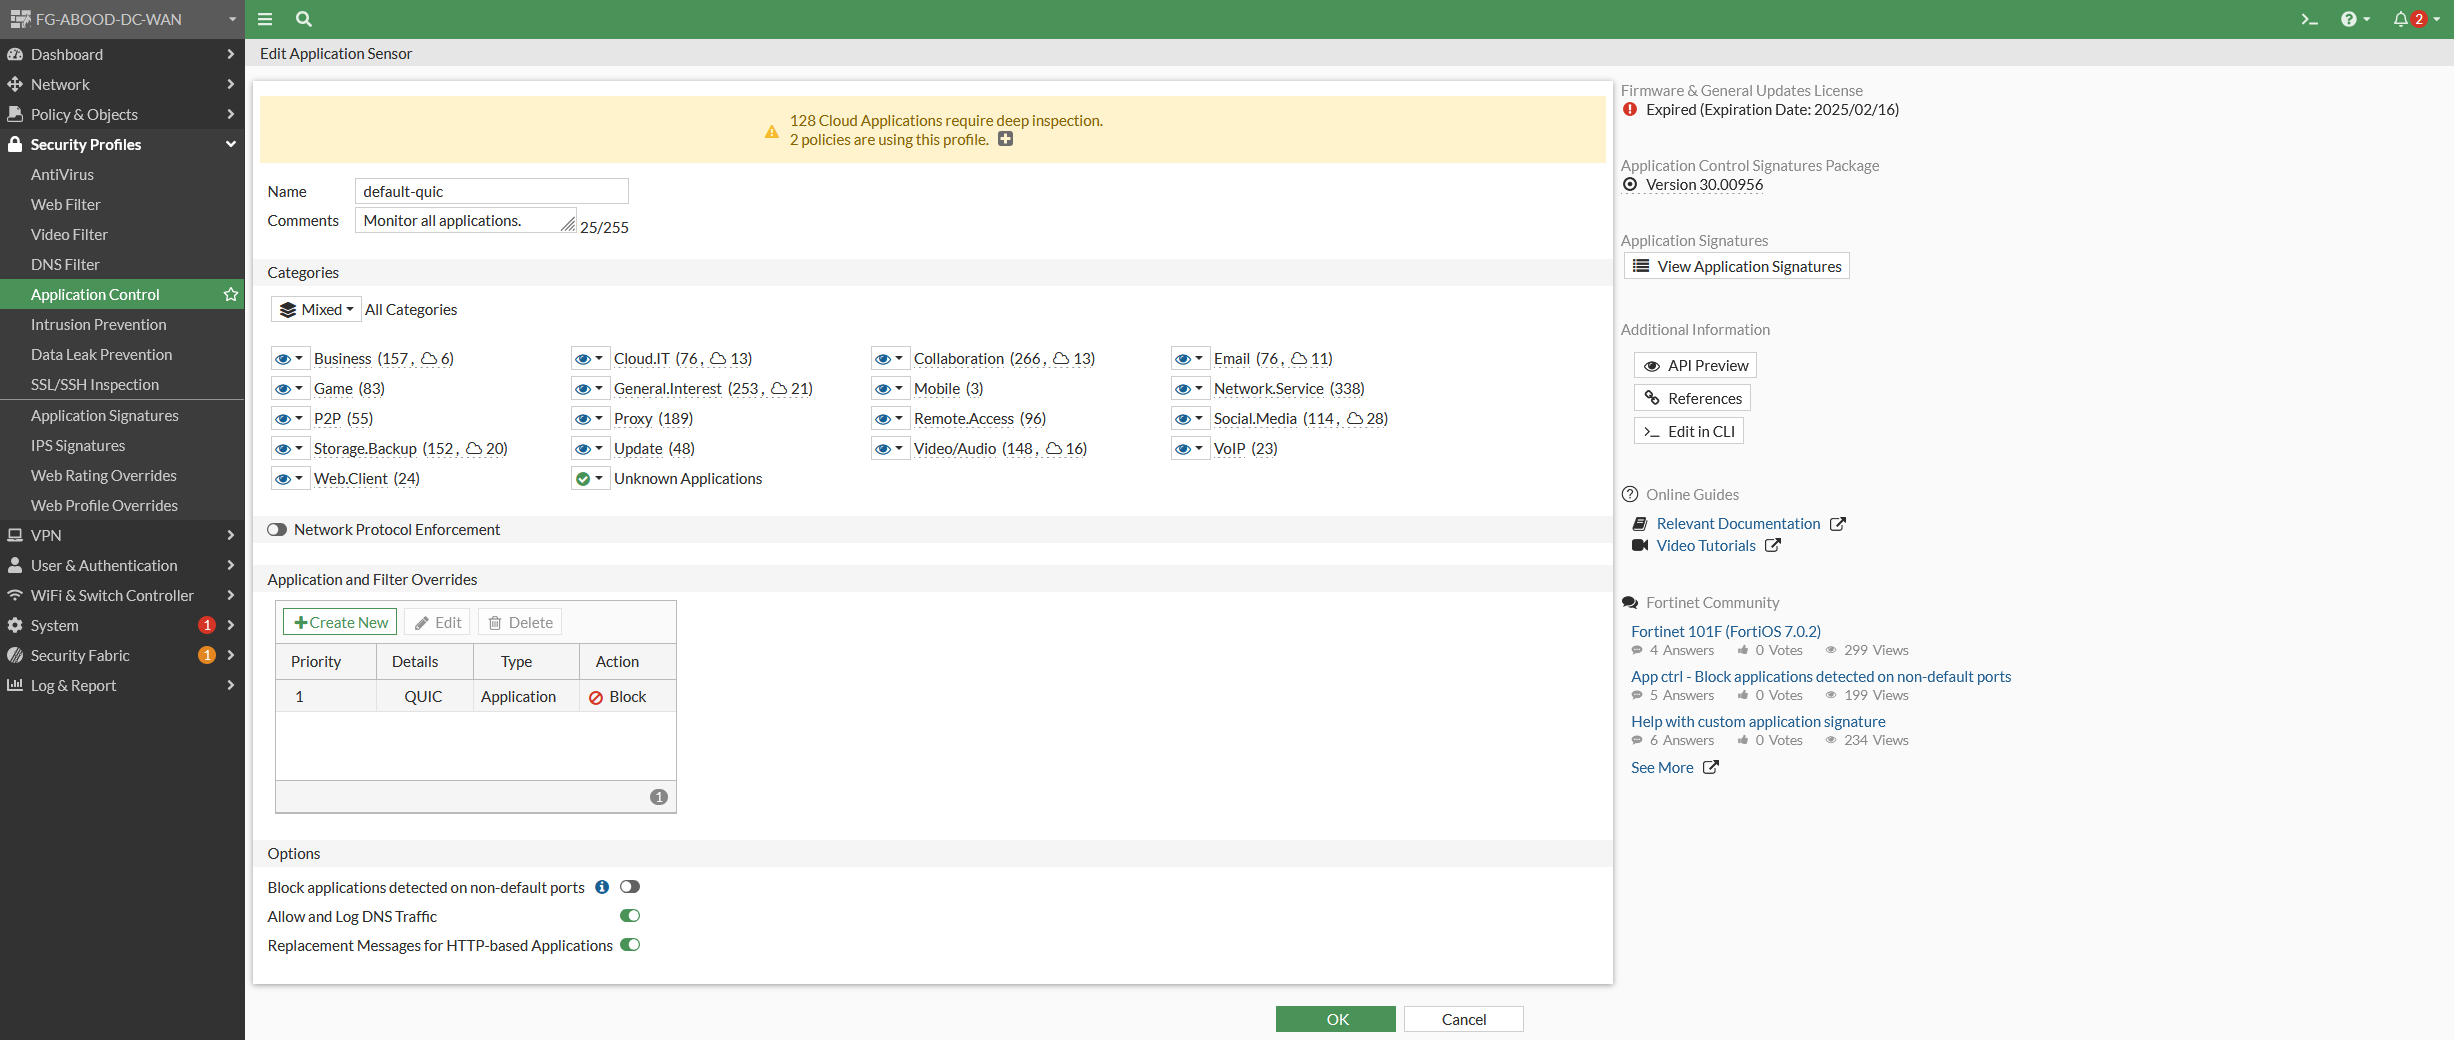
Step 5: Create an APP control profile
Create an application control profile with default settings (monitor all), with an override to block the QUIC protocol.
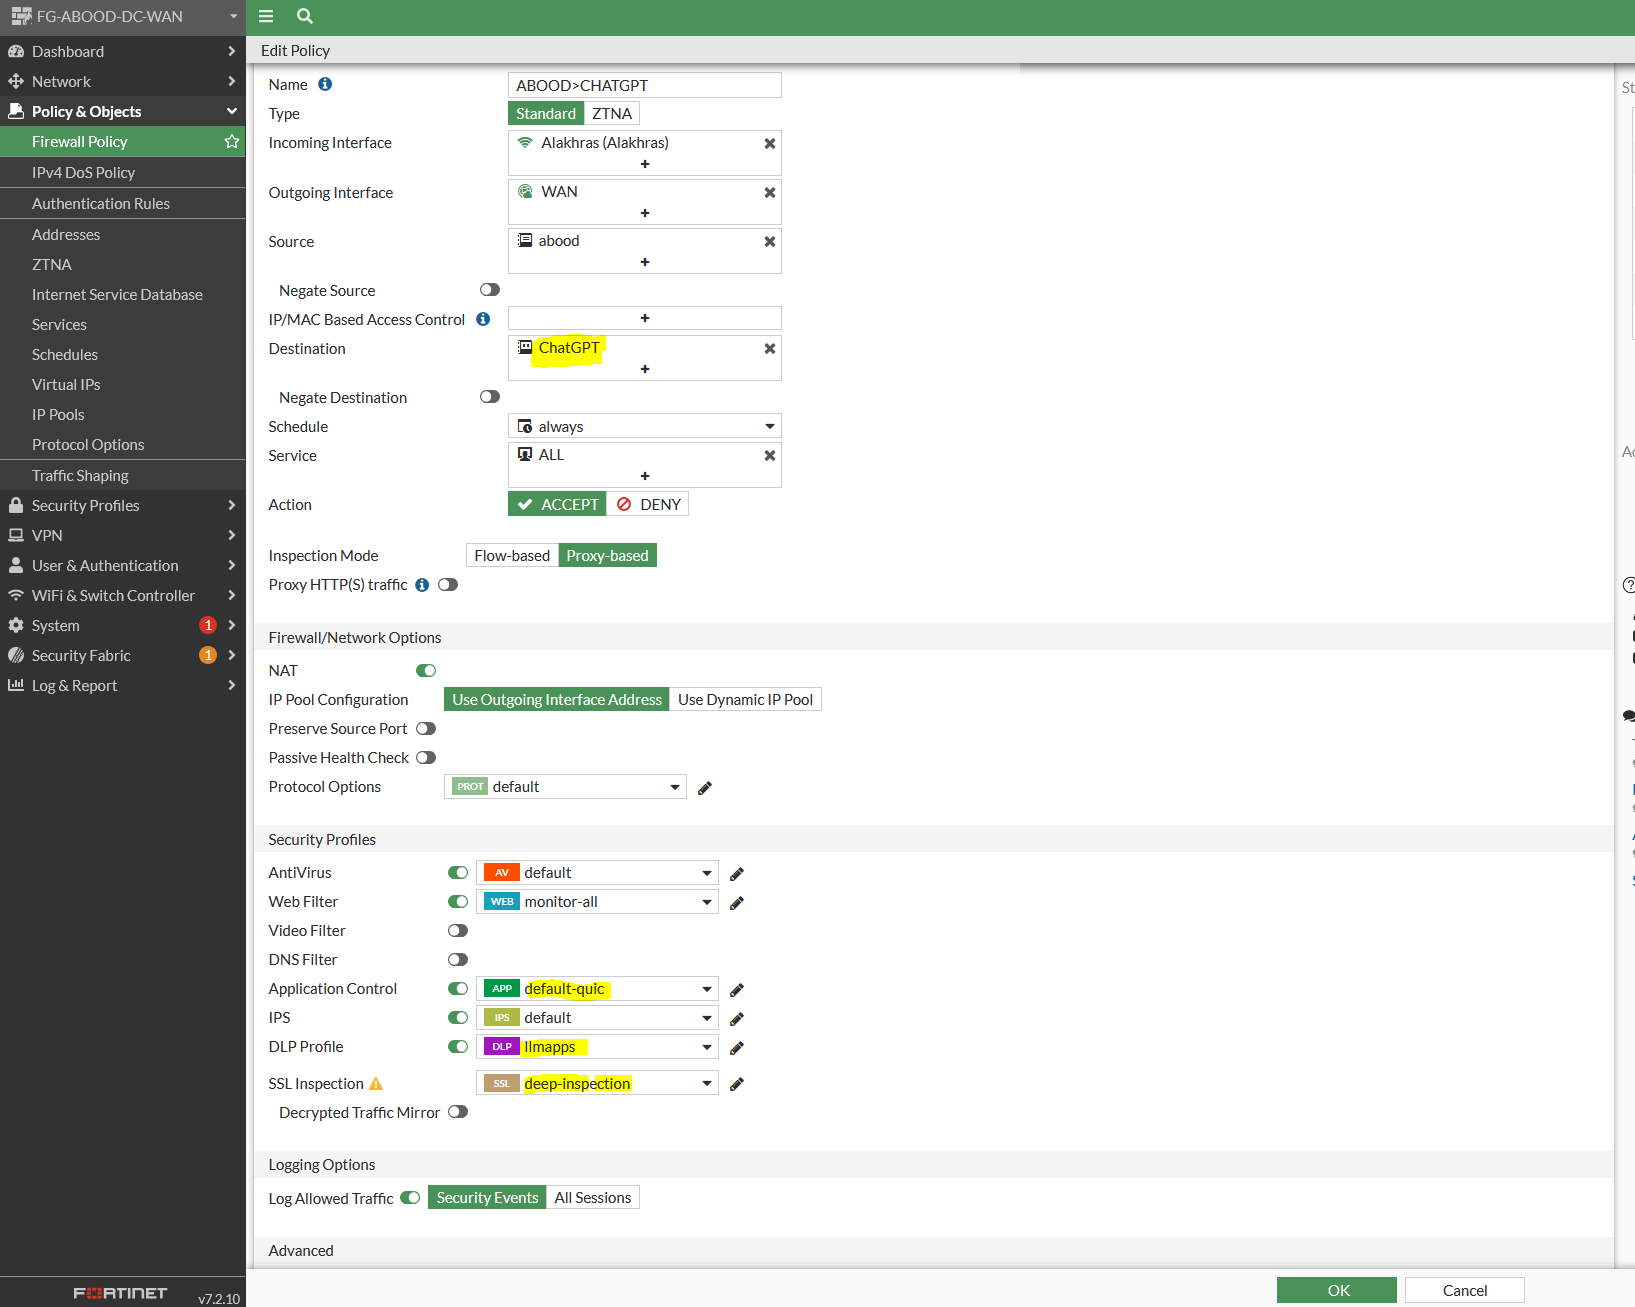
Step 6: Create a Firewall Policy
Create A firewall policy referencing the following:
- FQDN address created earlier as a destination.
- The Application control profile created earlier.
- The DLP profile created earlier.
The policy inspection type need to be proxy based , and using deep inspection.
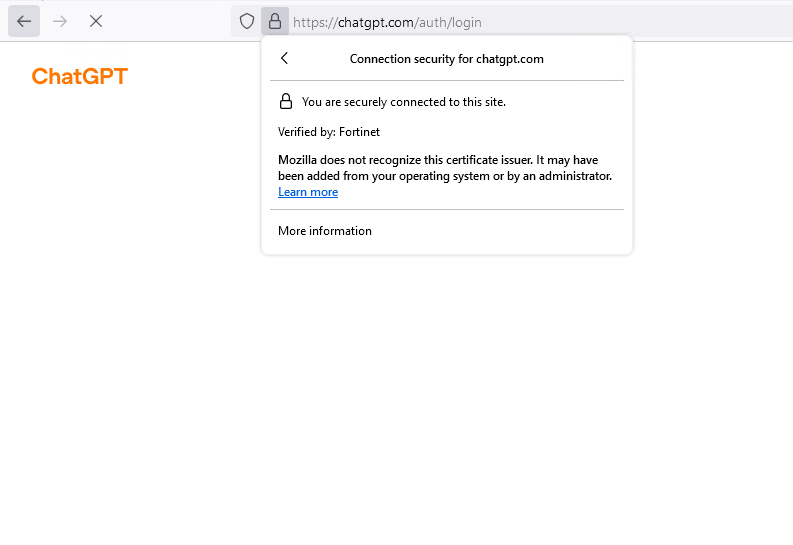
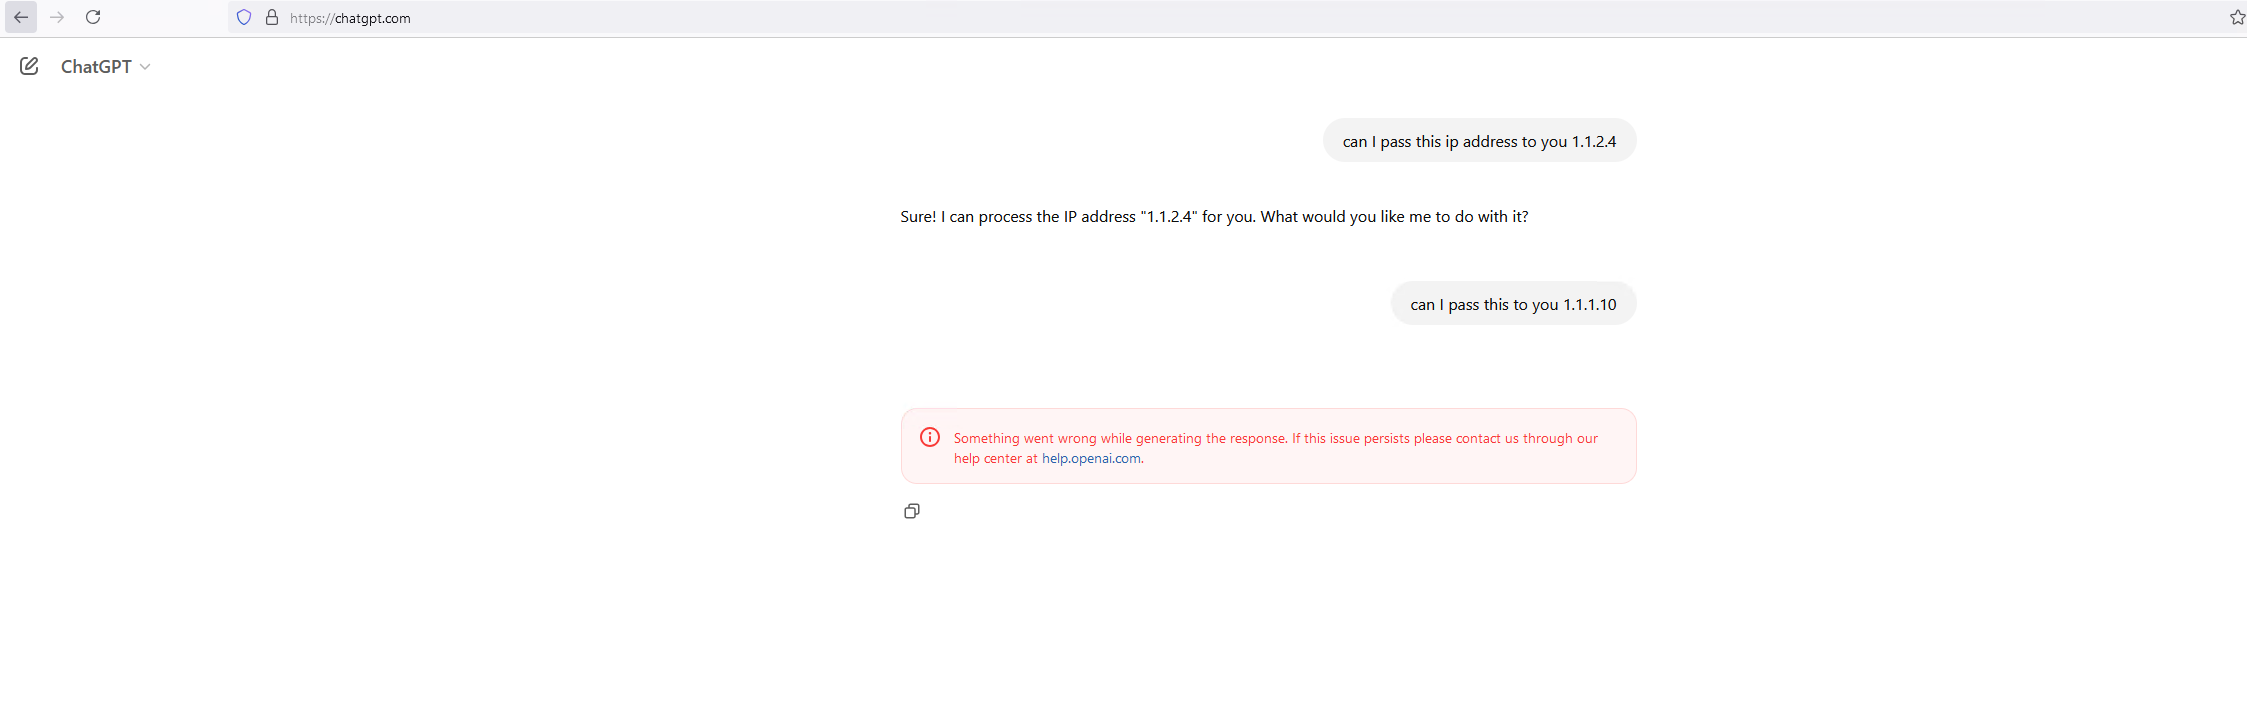
Step 7: Testing
Let’s now visit the website and attempt to leak information. Note that the “Fortinet” CA SSL certificate present itself for deep inspection.
This is why it’s a pre-requiste that the CA cert is imported to avoid certificate warning when a traffic interception occurs at the fortigate level as part of SSL decryption process.
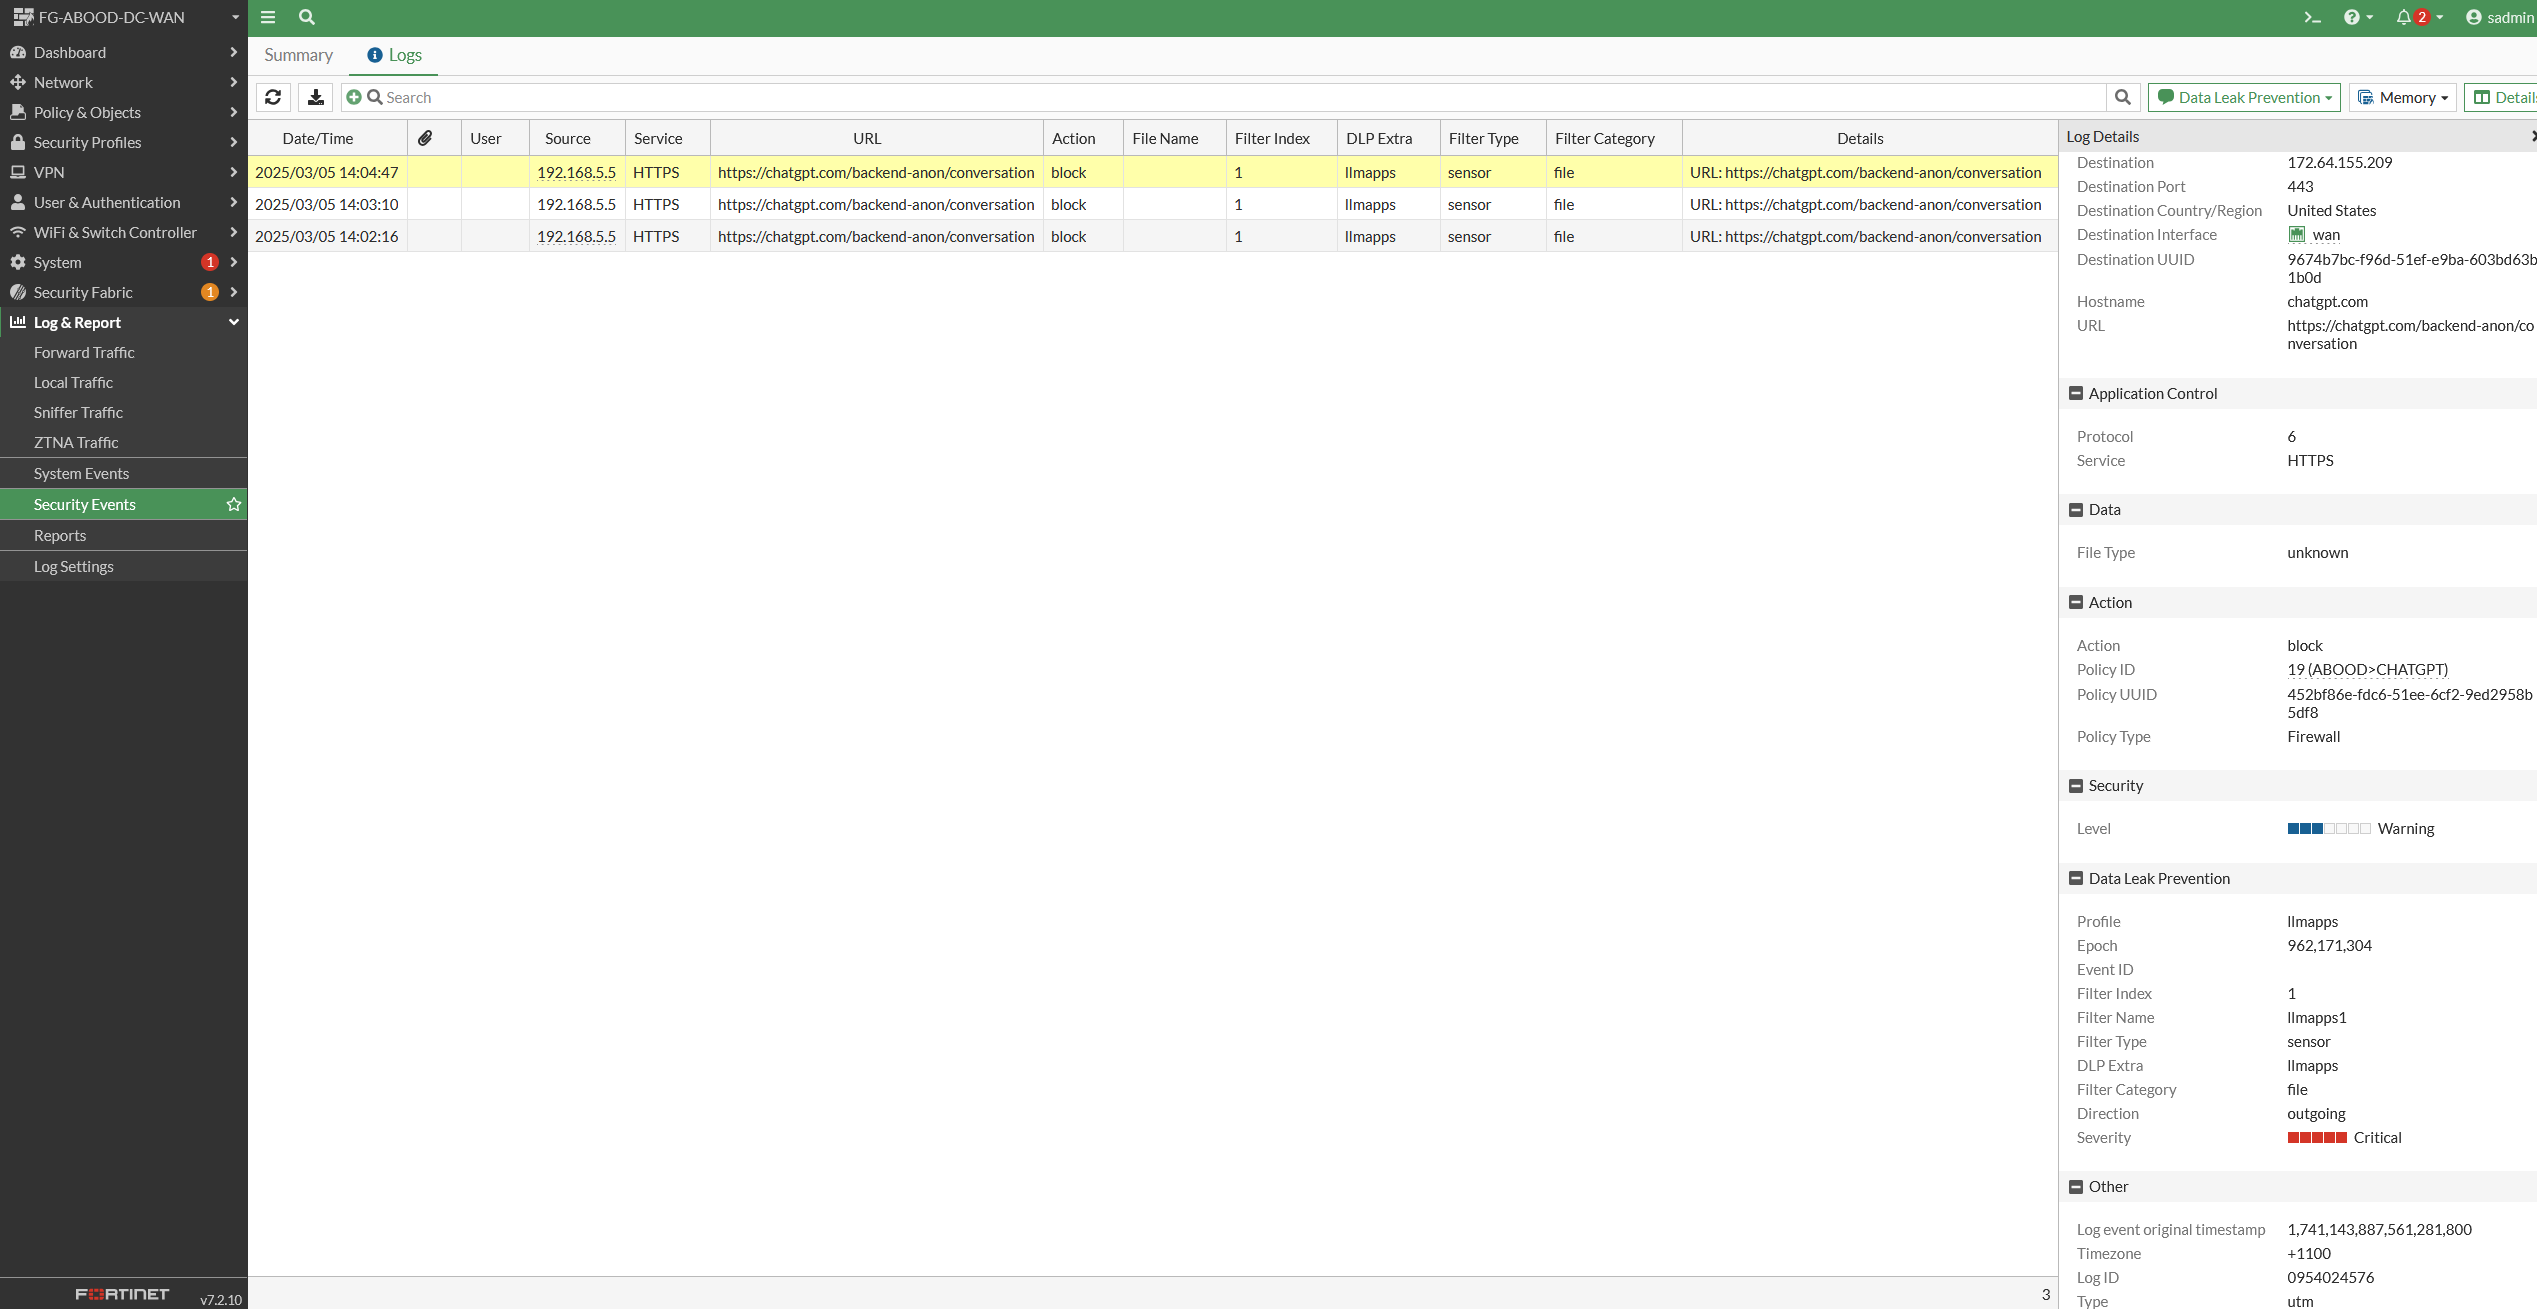
As per the testing below, notice that anything that contains the word “abood” or any ip from subnet 1.1.1.0/24 is not leaked to ChatGPT.

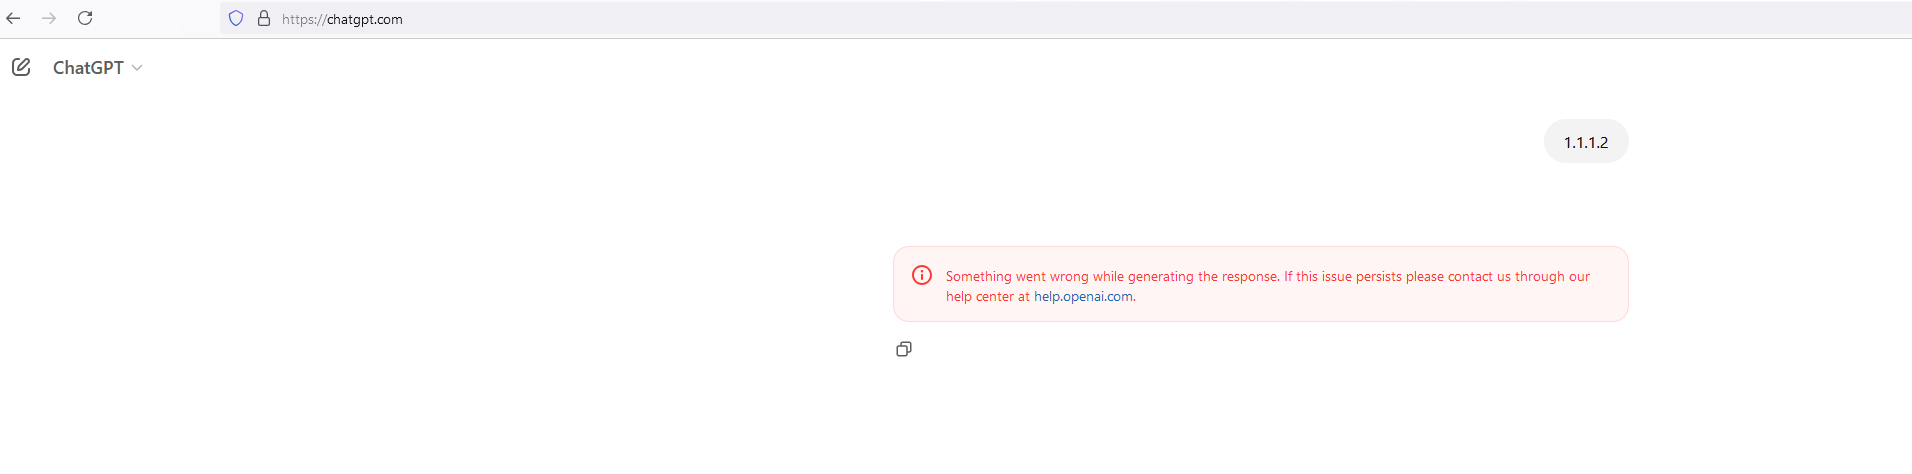
Notice the dlp logs of the these patterns are blocked